Adobe products – Adobe Products: Seriously, who
-hasn’t* heard of Photoshop? But there’s way more to the Adobe universe than just that iconic image editor. From designing killer logos in Illustrator to laying out the perfect magazine spread in InDesign, Adobe’s Creative Cloud is a total game-changer for anyone involved in visual creation. This deep dive explores the core applications, subscription plans, and even some sneaky workflow hacks to help you unlock your inner creative genius.
Table of Contents
We’ll be breaking down the key features of Photoshop, Illustrator, and InDesign, comparing their strengths, and showing you how they work together seamlessly. We’ll also look at some alternatives and speculate on the future of Adobe’s creative suite – because, let’s be honest, the possibilities are endless. Get ready to level up your creative game!
Adobe Creative Cloud Overview
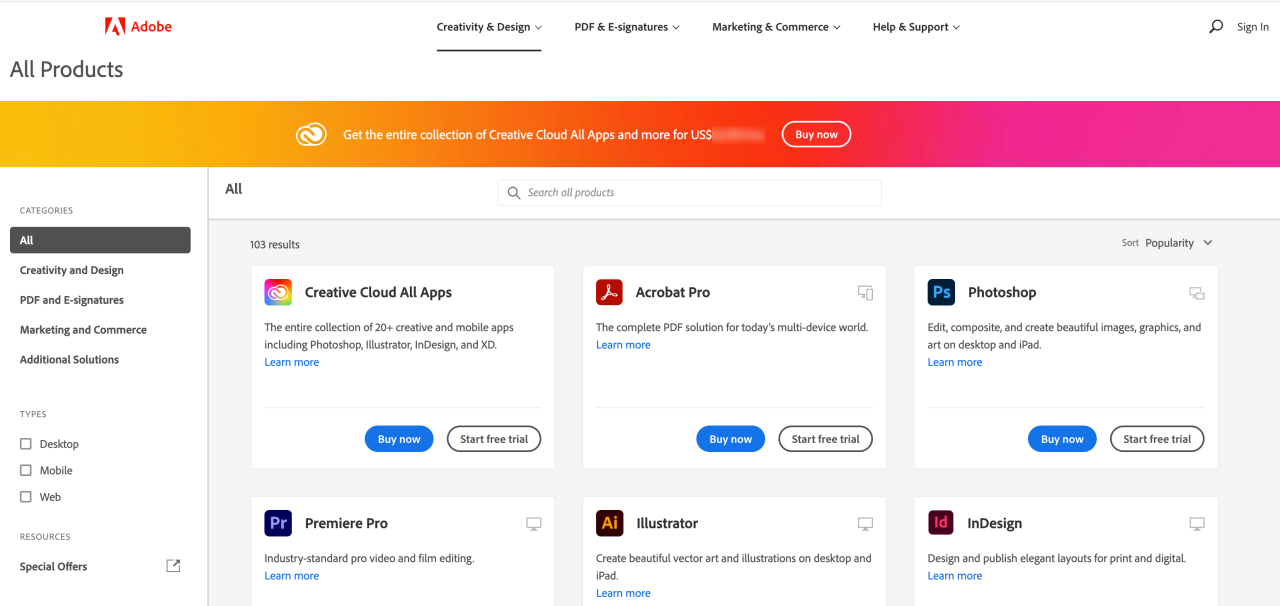
Adobe Creative Cloud (CC) is a subscription-based service offering a collection of industry-standard software for graphic design, video editing, web development, and more. It’s become the go-to creative suite for professionals and hobbyists alike, providing access to constantly updated applications and collaborative tools. This overview will explore the core applications, subscription plans, and pricing.
The Creative Cloud suite boasts a diverse range of applications, each designed for specific creative tasks. Core applications include Photoshop (for image editing and manipulation), Illustrator (for vector graphics and illustrations), InDesign (for page layout and publishing), Premiere Pro (for video editing), After Effects (for motion graphics and visual effects), and Audition (for audio editing and mixing). Beyond these, CC includes numerous other applications catering to specific needs, such as Lightroom (for photo management and editing), Dreamweaver (for web development), and Acrobat Pro (for PDF creation and manipulation).
Creative Cloud Subscription Plans
Adobe offers several Creative Cloud subscription plans, each tailored to different user needs and budgets. The key differentiators are the number of applications included and the price. Choosing the right plan depends on your specific creative workflow and budget. Understanding the features of each plan is crucial before making a decision.
Comparison of Creative Cloud Plans
Below is a comparison of three popular Creative Cloud plans: the Photography plan, the Single App plan, and the All Apps plan. This table highlights the key differences in pricing and included applications.
Adobe products are, like, totally essential for any college student, right? But sometimes you need a simpler solution for creating PDFs, especially if you’re not using the full Adobe Acrobat suite. That’s where a great alternative like pdf writer comes in handy. It’s a solid option for basic PDF creation, leaving your Adobe apps free for more complex design work.
| Plan Name | Price (USD/month) | Included Applications (Examples) | Best For |
|---|---|---|---|
| Photography Plan | $9.99 | Photoshop, Lightroom | Photographers and photo editors |
| Single App Plan | $20.99 | One Adobe application of your choice (e.g., Photoshop, Illustrator) | Users needing only one specific application |
| All Apps Plan | $54.99 | Access to all Creative Cloud applications | Professionals requiring a wide range of tools |
Note: Prices are subject to change and may vary based on region and subscription term (annual vs. monthly). Students and educators often qualify for discounted rates.
Individual Adobe Product Deep Dive: Adobe Products
Photoshop is arguably the most iconic and widely used image editing software in the world. Its power lies in its versatility, catering to everyone from casual photo editors to professional graphic designers and digital artists. From simple adjustments like cropping and color correction to complex manipulations and creations, Photoshop provides a comprehensive suite of tools to transform images.
Photoshop’s core functionality revolves around its robust layer system, allowing for non-destructive editing. This means you can make changes without permanently altering the original image, giving you complete freedom to experiment and refine your work. Other key features include a wide array of selection tools for precise editing, powerful masking capabilities for isolating and manipulating specific areas of an image, and an extensive library of filters and effects for adding creative flair.
Beyond image editing, Photoshop also facilitates digital painting, graphic design, and even 3D modeling, making it a truly multifaceted tool.
Creating a Realistic Photo Manipulation: A Step-by-Step Example
Let’s imagine we want to seamlessly integrate a photo of a majestic eagle into a landscape image. First, we’d open both images in Photoshop. Using the selection tools (like the lasso or pen tool for precise selection), we carefully select the eagle, ensuring a clean cut against the background. Next, we copy and paste the eagle onto the landscape layer.
We’d then use the transform tools (scale, rotate, perspective) to adjust the eagle’s size and position to fit naturally within the scene. To blend the eagle into the landscape, we’d utilize layer masks and adjustment layers. A layer mask allows us to selectively hide parts of the eagle layer, revealing the landscape underneath, creating a natural integration.
Adjustment layers (like curves or levels) can be used to match the color and lighting of the eagle to the landscape, ensuring a seamless and believable result. Finally, we might use the clone stamp tool or healing brush to further refine the edges and eliminate any harsh transitions, completing the realistic photo manipulation.
Five Advanced Photoshop Techniques
Beyond the basics, Photoshop offers a range of advanced techniques for achieving professional-level results. Here are five examples:
- Frequency Separation: This technique separates an image into its high-frequency (detail) and low-frequency (tone) components, allowing for independent editing of each. This is incredibly useful for retouching portraits, as you can smooth out skin tones without losing important details like freckles or wrinkles.
- Smart Objects: Smart Objects allow for non-destructive scaling and transformation of layers. This is crucial for maintaining image quality when resizing or manipulating elements repeatedly, preventing pixelation and loss of detail.
- Camera Raw Filter: This filter provides extensive non-destructive editing capabilities for RAW image files, allowing for adjustments to exposure, white balance, contrast, and sharpness, among many others. It’s a powerful tool for bringing out the best in your photographs.
- Actions: Actions automate repetitive tasks, saving you significant time and effort. This is invaluable for batch processing, applying consistent edits to multiple images, or creating complex effects efficiently.
- 3D Modeling and Texturing: Photoshop’s 3D capabilities allow for the creation and manipulation of 3D models and textures. This expands its use beyond 2D image editing, opening up possibilities for creating realistic product mockups or incorporating 3D elements into designs.
Individual Adobe Product Deep Dive: Adobe Products

Illustrator is the industry-standard vector graphics editor, beloved by designers worldwide for its precision and scalability. Unlike raster-based images (like those in Photoshop), Illustrator uses mathematical equations to define shapes, allowing for infinite scaling without loss of quality. This makes it perfect for logos, illustrations, and anything that needs to be printed at large sizes or adapted for various media.
This deep dive will explore Illustrator’s capabilities and walk you through creating a simple logo.
Illustrator’s power lies in its ability to create and manipulate vector objects. These objects, defined by points and curves, can be resized, re-colored, and transformed without pixelation. This precision is crucial for creating clean, sharp graphics suitable for print and digital use. It offers a robust set of tools for drawing, shaping, and manipulating these vectors, allowing for the creation of complex and intricate designs.
Beyond basic shapes, Illustrator also offers powerful tools for working with type, creating gradients and effects, and integrating with other Adobe Creative Cloud applications.
Illustrator Logo Design: A Step-by-Step Guide
Let’s design a simple logo using Illustrator. This guide will illustrate the basic workflow and demonstrate some core features.
- Create a New Document: Start by creating a new document in Illustrator, specifying the size and resolution appropriate for your intended use (e.g., web, print).
- Sketch Your Idea: Before diving into digital creation, it’s helpful to sketch your logo concept on paper. This helps refine the design before committing to the digital space.
- Shape Creation: Use Illustrator’s shape tools (rectangle, ellipse, polygon, etc.) to create the basic shapes of your logo. For example, if you are designing a logo for a coffee shop, you might start with a circle for a coffee bean.
- Pathfinder Panel: Utilize the Pathfinder panel to combine, subtract, or intersect shapes to create more complex forms. For instance, you could use the Pathfinder to create a coffee cup shape by combining a circle and a rectangle.
- Type Tool: Add text using the type tool. Experiment with different fonts and styles to find the best fit for your logo. Consider the readability and overall aesthetic of your design.
- Color and Gradient Application: Apply colors and gradients to your shapes and text. Experiment with different color palettes to find one that reflects the brand identity.
- Refinement and Detail: Use the Pen tool for precise adjustments and the addition of fine details. This tool allows you to create custom shapes and curves with great accuracy.
- Export: Once your logo is complete, export it in the appropriate format (e.g., SVG for web, AI for editing, EPS for print) for your intended use.
Illustrator Vectors vs. Photoshop Rasters
Illustrator’s vector capabilities differ significantly from Photoshop’s raster capabilities. Understanding this difference is key to choosing the right tool for the job.
| Feature | Illustrator (Vector) | Photoshop (Raster) |
|---|---|---|
| Image Composition | Mathematical equations define shapes | Pixels arranged in a grid |
| Scalability | Infinitely scalable without loss of quality | Quality degrades when scaled up |
| File Size | Generally smaller file sizes | Larger file sizes, especially at high resolutions |
| Editing | Precise editing of individual shapes and paths | Pixel-by-pixel editing |
| Best Use Cases | Logos, illustrations, typography | Photo editing, painting, digital art |
Individual Adobe Product Deep Dive: Adobe Products

InDesign is the industry-standard software for creating high-quality page layouts. Unlike Photoshop or Illustrator, which focus on raster and vector graphics respectively, InDesign excels at managing text and images within a structured document framework. This makes it perfect for projects that require precise control over typography, image placement, and overall page design. Think of it as the ultimate tool for bringing your print and digital publishing projects to life.InDesign’s power lies in its ability to handle complex layouts with ease, making it a versatile tool for a wide range of applications.
It allows for precise control over every element on the page, from font sizes and styles to the exact positioning of images and text boxes. This level of control is essential for professional-quality output.
Types of Documents Created with InDesign, Adobe products
InDesign is incredibly versatile. It’s not just for books; it’s used across many design disciplines. The software’s capabilities extend far beyond simple flyers.
- Brochures: Tri-fold brochures, marketing pamphlets, and even more complex multi-panel brochures are easily created and customized using InDesign’s master pages and layout tools.
- Books: From novels and textbooks to cookbooks and photo albums, InDesign is the go-to software for book layout and design. Its features for managing chapters, indexes, and cross-references are invaluable for large-scale projects.
- Posters: Large-format posters, advertisements, and even event signage benefit from InDesign’s precise control over image placement and typography. The ability to easily scale designs while maintaining high resolution is key.
- Magazines: InDesign handles the complex layouts of magazines with multiple columns, images, and articles seamlessly. Features like linked text boxes ensure a smooth workflow for content-heavy projects.
- Newsletters: Create professional-looking newsletters with consistent branding and layouts. InDesign’s master page functionality allows for easy maintenance of a consistent design across multiple pages.
Mock-up of a Book Cover in InDesign
Let’s imagine designing a cover for a fictional thriller novel titled “The Silent Watcher.” The process would begin by creating a new document in InDesign, specifying the desired dimensions (perhaps 6×9 inches for a standard paperback). I would then create a master page to ensure consistent elements like margins and bleed areas are maintained throughout the project.Next, I’d focus on the background.
Perhaps a dark, moody image of a shadowy figure lurking in the background, subtly hinting at the novel’s suspenseful nature. This image would be carefully placed and potentially adjusted for color and contrast using InDesign’s built-in image editing tools.The title, “The Silent Watcher,” would be prominently displayed, possibly using a bold, slightly gothic-style font to convey a sense of mystery.
The author’s name would appear beneath it, in a smaller, more understated font. I might add a small, evocative graphic element – perhaps a stylized eye – to further enhance the visual appeal and thematic consistency.Finally, I’d check the bleed settings to ensure that important design elements extend beyond the trim line to prevent white borders when the book is printed.
The entire process involves careful consideration of typography, imagery, and overall visual hierarchy to create a compelling and informative book cover that accurately reflects the genre and tone of the novel. The final design would be exported as a high-resolution PDF, ready for printing.
Adobe Product Integration and Workflow
The beauty of the Adobe Creative Cloud isn’t just in the individual applications, but in how seamlessly they work together. This interconnectedness allows for incredibly efficient workflows, drastically reducing the time and effort required for complex creative projects. Mastering these integrations unlocks a whole new level of creative potential.The strength of the Adobe ecosystem lies in its ability to transfer assets and data effortlessly between programs.
This eliminates redundant tasks and allows for a more fluid and intuitive creative process. Imagine starting a design in Illustrator, refining it in Photoshop, and finally laying it out in InDesign – all without ever having to manually recreate elements or reformat text. This kind of integrated workflow is a hallmark of professional-level design.
Photoshop, Illustrator, and InDesign Workflow Example
A common and powerful workflow involves the coordinated use of Photoshop, Illustrator, and InDesign. This combination is ideal for projects requiring high-resolution images, vector graphics, and sophisticated page layouts, such as brochures, posters, or even books.Consider the creation of a marketing brochure. First, high-quality product photography would be edited and enhanced in Photoshop. Then, vector-based logos and other design elements would be created and refined in Illustrator.
Finally, these assets – the photos and vector graphics – would be imported into InDesign to create the final brochure layout, incorporating text and ensuring consistent branding throughout. This seamless transfer of assets between applications is a key strength of the Adobe ecosystem.
Illustrative Workflow Flowchart
Imagine a flowchart depicting this process. It would begin with a “Start” box. The next box would be “Edit Photos in Photoshop,” followed by a box indicating “Create Vector Graphics in Illustrator.” Then, a box labeled “Import Assets into InDesign” would follow, leading to “Layout and Design in InDesign.” Finally, the flowchart would conclude with a “Finished Brochure” box.
The arrows connecting these boxes would visually represent the flow of the project from one application to the next. This straightforward visual representation clearly illustrates the interconnected nature of these Adobe products.
Adobe Products for Specific Industries
Adobe’s creative suite is ubiquitous across many industries, but its applications are particularly pronounced in advertising, web design, and graphic design/print. Understanding how these tools are used within these sectors highlights their power and versatility.
Adobe Products in Advertising
The advertising industry relies heavily on Adobe’s creative cloud, particularly Photoshop, Illustrator, and After Effects. Photoshop’s image editing capabilities are essential for creating compelling visuals for print and digital campaigns. Illustrator is crucial for designing logos, icons, and other vector-based assets that need to scale seamlessly across various media. After Effects, with its motion graphics and visual effects tools, is vital for producing engaging video advertisements and animated content.
InDesign plays a key role in laying out advertisements for print publications and brochures. These programs work together, allowing for a smooth workflow from initial concept to final product delivery. For example, a designer might use Illustrator to create a logo, then bring that logo into Photoshop to incorporate it into a banner ad, and finally use After Effects to animate the banner for online use.
Adobe Products in Web Design
Web design leverages a slightly different subset of Adobe’s offerings. Photoshop remains crucial for image optimization and creating website mockups. Illustrator is essential for designing website icons, buttons, and other vector graphics. However, Dreamweaver, while less frequently used now due to the rise of simpler website builders, still holds value for experienced web designers who need precise control over HTML, CSS, and JavaScript.
Adobe XD has become a dominant force in web design, providing tools for prototyping and user interface (UI) design, streamlining the process of creating interactive websites and applications. The ability to create interactive prototypes allows designers to test user experience (UX) before development begins, leading to more effective and user-friendly websites. For instance, a designer might use XD to create interactive wireframes, then export assets created in Photoshop and Illustrator to build the final website.
Adobe Products in Graphic Design and Print
In the graphic design and print industry, Adobe InDesign reigns supreme. Its page layout capabilities are indispensable for creating brochures, magazines, books, and other print materials. Photoshop is used extensively for retouching images and preparing them for print. Illustrator is vital for creating vector-based artwork for logos, illustrations, and other design elements. Acrobat Pro is crucial for creating and managing PDF files, ensuring consistent color profiles and high-quality output for printing.
The integration between these products allows for a seamless workflow, where designs created in Illustrator can be easily imported into InDesign for layout, and images processed in Photoshop can be seamlessly incorporated. A classic example would be designing a company brochure: Illustrator for the logo and illustrations, Photoshop for image editing, and InDesign for the overall page layout and text placement.
Alternatives to Adobe Products

Okay, so we’ve covered the Adobe Creative Cloud suite pretty extensively. But let’s be real, Adobe products aren’t cheap, and sometimes you might need a different approach. This section explores some viable alternatives, highlighting their strengths and weaknesses compared to industry giants like Photoshop and Illustrator. Keep in mind that “best” is subjective and depends heavily on your specific needs and workflow.
Image Editing Alternatives to Photoshop
Choosing a Photoshop alternative depends on your priorities. Do you need the most powerful features, or are you prioritizing affordability and ease of use? Here are three strong contenders, each with its own pros and cons:
- GIMP (GNU Image Manipulation Program): GIMP is a free and open-source raster graphics editor. Its strengths lie in its powerful feature set, which rivals Photoshop in many areas, and its completely free price tag. However, its interface can feel less intuitive than Photoshop’s, and it can have a steeper learning curve, especially for beginners. Some advanced features might also feel less polished compared to Photoshop.
- Affinity Photo: Affinity Photo is a professional-grade raster graphics editor that offers a robust feature set at a significantly lower price point than Photoshop. Its strengths are its excellent performance, user-friendly interface, and competitive pricing. However, it lacks some of the advanced features and extensive plugin ecosystem found in Photoshop. Its file compatibility, while generally good, isn’t quite as universal.
- Pixelmator Pro: Designed specifically for macOS, Pixelmator Pro is a user-friendly and powerful image editor known for its intuitive interface and streamlined workflow. Its strengths include its ease of use, excellent performance on Apple silicon, and a focus on non-destructive editing. However, its feature set, while impressive, is still somewhat smaller than Photoshop’s, and it’s only available for macOS.
Illustrator vs. Inkscape: A Vector Graphics Comparison
Adobe Illustrator is the industry standard for vector graphics editing, but Inkscape offers a compelling free and open-source alternative. Let’s compare their features and pricing:
| Feature | Adobe Illustrator | Inkscape |
|---|---|---|
| Pricing | Subscription-based (part of Creative Cloud) | Free and open-source |
| Features | Extensive feature set, industry-leading performance, vast plugin ecosystem | Robust feature set, capable of handling complex projects, active community support |
| Ease of Use | Relatively intuitive, but a learning curve exists | Steeper learning curve than Illustrator, but many tutorials are available |
| File Compatibility | Excellent compatibility with industry standard formats | Good compatibility, though some advanced features might not translate perfectly |
| Platform Compatibility | Windows, macOS | Windows, macOS, Linux |
Advantages and Disadvantages of Open-Source Alternatives
Open-source alternatives like GIMP and Inkscape offer significant advantages, primarily their free cost and community-driven development. This often leads to rapid innovation and a wide range of community-created plugins and extensions. However, open-source software often lacks the polish and comprehensive support of commercial software. The user interface may be less intuitive, and troubleshooting issues can sometimes be more challenging due to the lack of centralized support.
The community support, while often helpful, can be inconsistent in its quality and responsiveness. Also, feature sets might not always be as extensive or as well-integrated as commercial counterparts.
Future Trends in Adobe Products
Predicting the future of Adobe products is like trying to guess the next big thing in tech – exciting, challenging, and prone to some spectacular misses. However, based on current trends and Adobe’s past innovation, we can make some educated guesses about the direction the company is heading. Expect a continued push towards AI integration, enhanced cross-application workflows, and a deeper focus on specific industry needs.Adobe’s future likely involves a tighter integration between its creative suite and other Adobe applications.
Imagine a future where the seamless transfer of assets between Photoshop, Illustrator, and After Effects is not just smoother, but practically instantaneous. This might involve AI-powered tools that intelligently predict user needs, automating tedious tasks and suggesting optimal workflows. The overall user experience will likely become more intuitive and streamlined, catering to both beginners and seasoned professionals.
AI-Powered Creative Assistance
Artificial intelligence is already starting to reshape the creative landscape, and Adobe is at the forefront of this revolution. We can anticipate even more sophisticated AI features integrated into existing products. For example, imagine Photoshop using AI to automatically remove unwanted objects from images with unprecedented accuracy, or Illustrator leveraging AI to suggest design improvements based on established design principles.
Beyond simple automation, AI could also assist with more complex tasks, such as generating unique design elements or even assisting in the conceptualization phase of a project. Consider AI-powered tools that can analyze existing artwork and suggest similar styles or palettes, or tools that can intelligently upscale low-resolution images without losing quality. This is not science fiction; Adobe Sensei, Adobe’s AI framework, is already demonstrating these capabilities, albeit in their early stages.
The future will see these capabilities significantly enhanced.
Enhanced Collaboration and Cloud Integration
Adobe Creative Cloud’s cloud-based architecture is fundamental to its future. We can expect even more robust collaborative features, allowing designers and artists to work together seamlessly on projects, regardless of their physical location. This might involve real-time co-editing capabilities, improved version control, and more sophisticated feedback tools. The integration with other cloud-based services will likely deepen, allowing for a smoother workflow between creative tools and project management platforms, or even direct integration with client feedback systems.
Think of a scenario where designers and clients can simultaneously review and annotate designs within the Adobe ecosystem, dramatically shortening feedback cycles.
Industry-Specific Solutions
Adobe will likely continue to tailor its products to meet the specific needs of various industries. This could involve developing specialized tools for specific sectors like architecture, film production, or game development. Imagine Photoshop plugins optimized for photogrammetry workflows in architecture, or After Effects features designed to streamline VFX pipelines in filmmaking. These industry-specific tools will likely integrate seamlessly with existing Adobe products, creating a holistic and efficient workflow tailored to each profession.
We might also see Adobe expand its partnerships with hardware manufacturers to create bespoke hardware and software solutions designed to enhance the creative process in specific sectors.
Adobe Product User Experience
Adobe products, while industry-leading, present a complex user experience that varies significantly across their suite. Understanding this UX is crucial for maximizing productivity and avoiding frustration. This section will focus on Premiere Pro, comparing its interface and user experience to Photoshop, highlighting both strengths and areas for improvement.Premiere Pro’s interface, while initially daunting, is largely intuitive once users grasp the core concepts.
The timeline, a central feature, allows for non-linear video editing, offering great flexibility. Panels are customizable, allowing users to tailor their workspace to specific workflows. However, the sheer number of features and options can feel overwhelming for beginners, and the nested menu structures can sometimes lead to inefficient navigation. The color-coding system, while helpful, isn’t always consistent across different features and panels.
Premiere Pro User Interface and User Experience
Premiere Pro’s strength lies in its powerful, non-linear editing capabilities. The timeline is visually intuitive, representing audio and video tracks clearly. The effects panel provides a broad range of options, from simple color corrections to sophisticated visual effects. However, the sheer volume of options can be overwhelming, particularly for new users. The keyboard shortcuts, while extensive, require significant memorization to fully utilize.
The integration with other Adobe products, like After Effects, is generally smooth, but the process can still be complex for users unfamiliar with both applications. For example, the round-trip workflow between Premiere Pro and After Effects, while powerful, involves understanding multiple file formats and rendering processes.
Areas for Improvement in Premiere Pro’s UX
Several aspects of Premiere Pro’s UX could be streamlined. The search functionality could be improved to better locate specific effects or tools. A more robust tutorial system, integrated directly into the application, would be beneficial for new users. Furthermore, a more intuitive system for managing projects and media files would alleviate some common user frustrations. Many users find the organization of project files and the management of media assets to be cumbersome, especially when dealing with large projects.
Improved visual cues and a more streamlined file management system could greatly enhance the user experience.
Comparison of Premiere Pro and Photoshop UX
Comparing Premiere Pro to Photoshop reveals interesting contrasts in their UX design. Photoshop, while also feature-rich, presents a more modular interface. Its tools are generally more easily accessible, and the workspace is more customizable. Photoshop’s layers system, for example, is renowned for its intuitive design, whereas Premiere Pro’s track-based system requires a steeper learning curve. However, Photoshop’s strengths in image manipulation don’t translate directly to video editing.
Premiere Pro’s timeline-based approach, while initially more complex, is essential for non-linear video editing. The two applications, despite their differences, share some common UX elements, such as customizable panels and keyboard shortcuts, showcasing Adobe’s design language. However, the overall workflow and user experience differ significantly due to the fundamentally different nature of their respective tasks.
Final Summary

So, there you have it – a whirlwind tour through the world of Adobe products! From the power of Photoshop to the precision of Illustrator and the layout mastery of InDesign, Adobe’s suite offers something for every creative professional. Whether you’re a seasoned pro or just starting out, understanding the capabilities of these tools, and how they integrate, is key to unlocking your full creative potential.
Go forth and create amazing things!
Question Bank
Is Adobe Creative Cloud worth the cost?
It depends on your needs. If you’re a serious creative professional using the software daily, the subscription is generally considered worthwhile. For casual users, exploring free alternatives might be a better fit.
Can I use Adobe products offline?
Most Adobe apps require an internet connection for activation and licensing, but you can often work offline once activated. However, features like cloud syncing won’t be available offline.
What’s the difference between Photoshop and GIMP?
Photoshop is industry-standard, boasting superior features, performance, and a massive plugin ecosystem. GIMP is a free and open-source alternative, great for learning, but lacks some of Photoshop’s advanced capabilities.
How much storage does Creative Cloud offer?
Storage space varies depending on your subscription plan. Check your plan details for specifics, but it’s usually a decent amount of cloud storage for your projects.
Can I share my Adobe Creative Cloud subscription?
Nope, Adobe licenses are typically tied to a single user and cannot be shared across multiple accounts. Attempting to do so violates their terms of service.