Adobe Creative Cloud download: So you’re ready to dive into the world of Photoshop, Illustrator, and all those other awesome Adobe apps? Getting started is easier than you think! This guide walks you through downloading, installing, and managing your Creative Cloud subscription, covering everything from system requirements to troubleshooting those pesky download errors. We’ll break down the process step-by-step, so you can be creating amazing projects in no time.
Table of Contents
Let’s get this show on the road!
From choosing the right subscription plan (individual apps or the full suite) to optimizing your download speed and managing storage space, we’ve got you covered. We’ll even tackle common login issues and explain how to keep your account secure. Whether you’re a seasoned pro or a complete newbie, this guide is your one-stop shop for conquering the Adobe Creative Cloud download process.
Download Process Overview: Adobe Creative Cloud Download

Downloading Adobe Creative Cloud is pretty straightforward, but knowing what to expect beforehand can make the process smoother. This section will walk you through the steps, system requirements, and available download options. It’s all about getting you up and running with your favorite creative tools as quickly as possible.The download process itself is relatively simple and intuitive. First, you’ll need an active Adobe Creative Cloud membership.
Once you’ve logged in, you’ll be presented with a selection of applications and suites. Choosing your desired apps initiates the download. The actual download speed will depend on your internet connection and the size of the chosen application(s). After the download completes, the installer will launch, guiding you through the installation process. Remember to allow sufficient time, especially for larger suites like the full Creative Cloud suite.
System Requirements
Before you even think about downloading, it’s crucial to ensure your system meets Adobe’s minimum requirements. Attempting to install Creative Cloud apps on an underpowered machine will likely result in poor performance or outright failure. These requirements vary slightly depending on the specific application, but generally include sufficient RAM (at least 8GB is recommended for most applications, more for video editing), a reasonably modern processor (Intel or AMD), and ample hard drive space.
You’ll also need a compatible operating system (Windows or macOS). Checking the Adobe website for the exact specifications for each app before downloading is highly recommended. Ignoring these requirements can lead to frustrating delays, crashes, and an overall unpleasant experience.
Download Options, Adobe creative cloud download
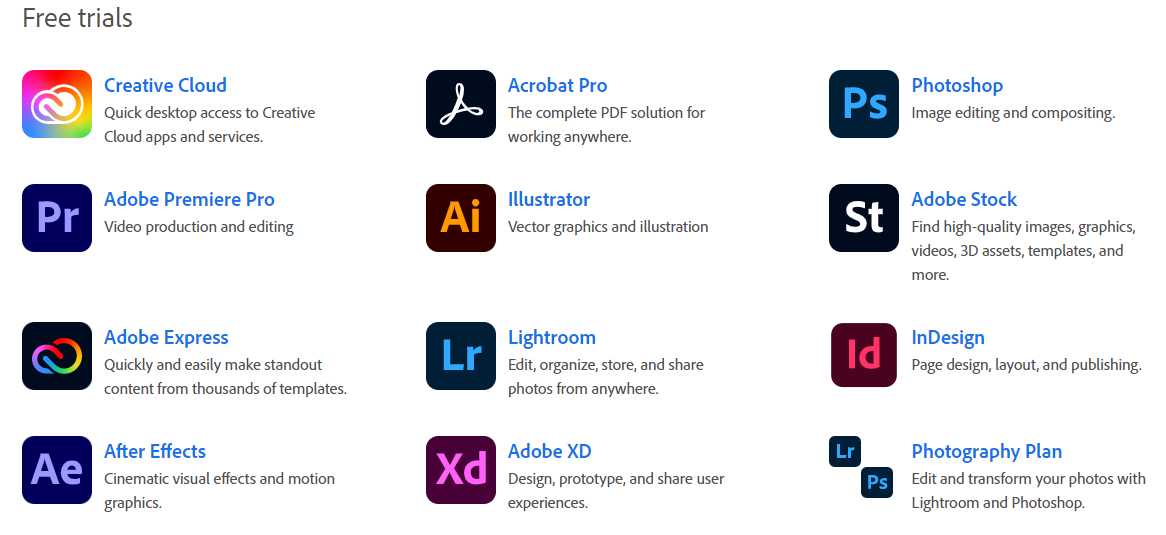
Adobe offers several download options to suit different needs and workflows. You can download individual applications, like Photoshop or Illustrator, if you only need specific tools. This is a great option for users who only need a few key apps and want to save on storage space and download time. Alternatively, you can download the full Creative Cloud suite, which includes all of Adobe’s applications.
This is the best option for users who require access to the entire range of Adobe’s creative software. The choice depends entirely on your individual needs and budget. For example, a photographer might only need Photoshop and Lightroom, while a graphic designer might require the full suite, including InDesign and Illustrator.
Account Creation and Login
Getting started with Adobe Creative Cloud requires creating an account or logging into an existing one. This process is straightforward, but we’ll cover the steps and some common troubleshooting tips to ensure a smooth experience. The account creation process is designed to be quick and intuitive, while the login process is secure and reliable.
Creating an Adobe Creative Cloud Account
To create a new Adobe Creative Cloud account, navigate to the Adobe website. You’ll typically find a prominent “Sign Up” or “Create Account” button. Clicking this will initiate the account creation process. You’ll be asked to provide some basic information, including your email address, a password (that meets their security requirements – think strong password!), and potentially your name and country.
Adobe may also ask for a payment method if you are subscribing to a paid plan. Follow the on-screen instructions carefully; they’ll guide you through each step. Remember to choose a strong, unique password that you can easily remember but is difficult for others to guess. Consider using a password manager to help you generate and manage strong passwords across different accounts.
Logging into an Existing Adobe Creative Cloud Account
Logging in is equally simple. Visit the Adobe website and look for the “Sign In” button. Enter your Adobe ID (usually your email address) and your password in the provided fields. Click “Sign In,” and you’ll be taken to your Creative Cloud dashboard, where you can access your applications and manage your account. If you’ve enabled two-factor authentication, you’ll need to complete an additional verification step, typically via a code sent to your phone or email.
This extra security measure helps protect your account from unauthorized access.
Troubleshooting Common Login Issues
Occasionally, you might encounter problems logging in. For example, you might forget your password or encounter an error message. If you’ve forgotten your password, don’t panic! Adobe provides a password recovery option. Usually, you’ll find a “Forgot your password?” link on the login page. Clicking this will initiate a password reset process, often involving receiving a link via email to create a new password.
If you’re encountering an error message, try these steps: First, ensure you’re typing your Adobe ID and password correctly, paying attention to capitalization. Check your internet connection; a weak or unstable connection can sometimes interfere with the login process. If the problem persists, try clearing your browser’s cache and cookies. If none of these steps resolve the issue, contact Adobe support directly for assistance; they have dedicated teams to help users through these technical hiccups.
Software Installation and Updates
Getting your Adobe Creative Cloud apps up and running is pretty straightforward. This section covers installing, updating, and uninstalling your software, ensuring you always have the latest features and a smooth workflow. We’ll walk you through the process for both new installations and managing existing software.
Installing Adobe Creative Cloud Applications
The Creative Cloud desktop app acts as your central hub for all things Adobe. After signing in, you’ll see a catalog of available apps. To install an application, simply locate it in the catalog, click the “Install” button, and the app will download and install automatically. The installer will guide you through any necessary permissions requests. Larger applications might take some time depending on your internet speed and computer’s processing power.
During the installation, you’ll typically see a progress bar indicating the download and installation status. Once complete, the app will appear in your applications folder and be ready to use.
Updating Existing Applications
Keeping your apps updated is crucial for accessing new features, performance improvements, and security patches. The Creative Cloud desktop app automatically checks for updates. You’ll receive a notification if an update is available. Simply click the “Update” button next to the application needing an update. The update will download and install automatically, often in the background without interrupting your workflow.
You might need to restart the application after the update is complete to apply the changes. If automatic updates are disabled, you can manually check for updates by opening the Creative Cloud desktop app and selecting the “Updates” tab.
Uninstalling Applications
Removing an Adobe Creative Cloud application is also handled through the Creative Cloud desktop app. Don’t just delete the app from your Applications folder; use the Creative Cloud app to ensure a clean removal. Find the application you wish to uninstall in the list of installed apps. Click the three vertical dots (ellipsis) next to the application name. A menu will appear; select “Uninstall.” The application will be removed from your system.
This process ensures that all associated files and settings are correctly deleted, preventing potential conflicts with future installations or updates.
Installation Methods Across Operating Systems
This table summarizes the typical installation methods for different operating systems. Keep in mind that specific steps might vary slightly depending on the Adobe application and your operating system version.
| Operating System | Installation Method | Update Method | Uninstall Method |
|---|---|---|---|
| macOS | Download and run the installer package from the Creative Cloud desktop app. | Automatic updates via Creative Cloud desktop app, or manual check for updates. | Uninstall via Creative Cloud desktop app. |
| Windows | Download and run the installer executable from the Creative Cloud desktop app. | Automatic updates via Creative Cloud desktop app, or manual check for updates. | Uninstall via Creative Cloud desktop app. |
| iPadOS | Download and install from the App Store. | Automatic updates via the App Store. | Uninstall via the App Store. |
| Android | Not applicable (most Creative Cloud apps are not available for Android). | Not applicable | Not applicable |
Trial Versions and Subscription Plans

So, you’re ready to dive into the Adobe Creative Cloud universe, but maybe you’re not quite ready to commit to a full subscription just yet. That’s totally understandable! Let’s break down your options for trial versions and the different subscription plans available. Understanding these will help you choose the perfect fit for your needs and budget.Adobe offers several ways to access its powerful software, from free trials to various subscription plans catering to different usage levels and creative professions.
Each option comes with its own set of features and limitations, so choosing the right one is key to maximizing your creative potential without breaking the bank.
Adobe Creative Cloud Trial Versions
Trial versions provide a limited-time access to the full suite of Adobe Creative Cloud applications. This allows you to explore the software’s capabilities and determine if it aligns with your workflow and creative goals before committing to a paid subscription. Typically, these trials last for seven days. During this period, you have unrestricted access to all features, allowing you to create and save projects.
However, upon trial expiration, you’ll lose access to your saved projects unless you purchase a subscription. Think of it as a test drive before buying the car! This allows you to thoroughly evaluate the software’s features, interface, and overall usability to ensure it’s the right fit for your needs.
Adobe Creative Cloud Subscription Plans
Adobe offers a variety of subscription plans to suit different needs and budgets. These range from individual plans for single users to team and enterprise plans for larger organizations. Key differences often include the number of apps included, the level of cloud storage provided, and the overall cost.For example, the “Photography plan” focuses on applications like Photoshop and Lightroom, ideal for photographers and photo editors.
Meanwhile, the “All Apps” plan offers access to the entire Creative Cloud library, catering to a broader range of creative professionals. Pricing varies depending on the plan and the length of the commitment (monthly vs. annual). Annual subscriptions usually offer a cost savings compared to monthly subscriptions. Choosing the right plan depends entirely on your specific software needs and usage patterns.
Upgrading and Downgrading Subscriptions
Changing your Creative Cloud subscription is usually a straightforward process. You can typically manage your plan directly through your Adobe account online. Upgrading involves selecting a higher-tier plan with more features or apps, while downgrading involves switching to a plan with fewer features or a lower cost. Note that downgrading might result in the loss of access to certain applications or features.
For example, if you downgrade from the “All Apps” plan to the “Photography” plan, you’ll lose access to applications not included in the Photography plan, like Illustrator or After Effects. The process usually involves a simple selection of the desired plan followed by confirmation and payment adjustment. Adobe will typically prorate the cost, meaning you only pay for the remaining portion of your current billing cycle for the new plan.
Download Speed and Optimization
Downloading Adobe Creative Cloud apps can sometimes feel like waiting for paint to dry, especially if you’re on a slower connection or during peak server usage. Understanding the factors that influence download speed and employing a few optimization strategies can significantly reduce your wait time. This section will cover those factors and provide practical tips to get those creative apps downloaded quickly.Getting your Creative Cloud apps downloaded quickly depends on several interacting factors.
Your internet connection’s speed and stability play a huge role; a slow or unstable connection will naturally result in a slower download. Server load on Adobe’s end is another key factor—if many people are downloading simultaneously, it can slow things down for everyone. Finally, your computer’s processing power and available RAM can also subtly affect download speed.
Factors Affecting Download Speed
Several factors contribute to the speed of your Creative Cloud download. A strong, stable internet connection with high bandwidth is essential. Think of bandwidth like a highway; the wider the highway (higher bandwidth), the more data can travel at once. Conversely, a congested network, such as during peak hours, or a slow connection, can significantly impact download speeds.
Additionally, the server load on Adobe’s side can create bottlenecks. If many users are downloading simultaneously, the server might struggle to keep up, resulting in slower download speeds for everyone. Finally, the performance of your computer, specifically its processing power and available RAM, also affects download speeds, although this effect is typically less significant than internet speed and server load.
Tips for Optimizing Download Speed
To maximize your download speed, consider these tips. First, download during off-peak hours. Avoid downloading during the evening when many people are likely using their internet connections, as this reduces server load and network congestion. Second, close unnecessary applications. Running many programs simultaneously can consume your computer’s resources, potentially slowing down your download.
Third, use a wired connection whenever possible. Wired connections generally provide a more stable and faster connection compared to Wi-Fi, especially if you’re far from your router. Finally, consider temporarily pausing other downloads or streaming services. This frees up your bandwidth, allowing for a faster Creative Cloud download.
Resuming Interrupted Downloads
The Creative Cloud downloader is designed to handle interruptions gracefully. If your download is interrupted due to a network issue or power outage, you don’t need to start over from scratch. The downloader will automatically resume where it left off once the connection is restored. Simply relaunch the Creative Cloud application, and it will detect the incomplete download and continue from the point of interruption.
This feature is invaluable for large files, preventing the need to redownload gigabytes of data.
Troubleshooting Download Errors
So, you’re trying to download Adobe Creative Cloud, and things aren’t going as planned? Don’t worry, download hiccups happen to the best of us. This section will walk you through some common problems and how to fix them. We’ll cover the most frequent errors and offer practical solutions to get you back on track to creating amazing stuff.
Download errors with Adobe Creative Cloud can stem from a variety of issues, ranging from temporary internet connectivity problems to more complex software conflicts. Identifying the root cause is key to a swift resolution. Understanding the error message is your first step; often, the message itself provides clues about what went wrong.
Common Download Errors and Their Causes
Download errors often manifest as error codes or generic messages. These could indicate a problem with your internet connection, a corrupted download, or a conflict with your system’s security software. For example, a “download failed” message might be accompanied by an error code that provides more specific information. Another common scenario involves a download that stalls or slows to a crawl, often due to network congestion or insufficient bandwidth.
Solutions for Resolving Common Download Errors
Troubleshooting download errors often involves a systematic approach. Let’s start with the simplest solutions and work our way up.
- Check your internet connection: Ensure you have a stable internet connection with sufficient bandwidth. Try restarting your router or modem. Run a speed test to verify your download speed. A slow connection will significantly impact download times and may lead to errors.
- Restart your computer: A simple restart can often resolve temporary glitches that interfere with downloads. Closing unnecessary applications can also free up system resources.
- Disable firewalls and antivirus software (temporarily): Sometimes, security software can mistakenly block the Creative Cloud download. Temporarily disabling these programs (and re-enabling them afterward) can help determine if they’re the culprit. Remember to re-enable them as soon as the download is complete.
- Clear your browser cache and cookies: Accumulated cache and cookies can sometimes interfere with downloads. Clearing them can resolve this issue.
- Try a different browser: If you’re using Chrome, try Firefox or Edge. A different browser might resolve browser-specific download problems.
- Re-download the software: If other steps fail, try downloading the software again. Sometimes the initial download might have been corrupted.
Contacting Adobe Support
If you’ve exhausted all troubleshooting steps and are still experiencing download problems, it’s time to reach out to Adobe support. They have dedicated teams ready to assist with technical issues.
Adobe offers several support channels, including online help articles, phone support, and community forums. Their website usually provides detailed instructions on how to contact them, depending on your subscription type and the nature of your problem. Expect to provide information about the error message, your operating system, and the version of Creative Cloud you’re trying to download. Having this information ready will help expedite the support process.
Storage Space and Management

So, you’ve downloaded Adobe Creative Cloud – congrats! Now, let’s talk about something equally important: managing the space those awesome apps take up on your hard drive. Running out of storage can be a major buzzkill, especially when you’re in the middle of a creative project. Understanding how much space you need and how to keep things tidy is key to a smooth workflow.Adobe Creative Cloud applications, depending on which ones you install, can require a significant amount of hard drive space.
A basic installation might take up several gigabytes, while a full suite of applications, including Photoshop, Illustrator, Premiere Pro, and After Effects, could easily consume tens of gigabytes, even more if you include large project files. The exact amount depends on the version of the software and the features you choose to install. Think of it like this: each app is like a digital toolbox, and the more tools you have, the more space they’ll need.
Storage Space Requirements
The space required varies wildly based on the apps installed and their versions. For example, Photoshop alone might take up 5-10 GB, while the entire Creative Cloud suite could easily consume 50 GB or more. Regular updates also contribute to the overall space usage. It’s always a good idea to check the system requirements on Adobe’s website before installing to get a more accurate estimate for your specific configuration.
Remember to factor in space for your project files as well; these can often exceed the size of the applications themselves.
Effective Storage Space Management
Managing storage space effectively is crucial for maintaining a smooth workflow. Regularly deleting unnecessary files, both project files and application cache, is essential. Consider using cloud storage services like Adobe Creative Cloud storage (separate from the application downloads) or Dropbox to store your larger project files, freeing up space on your local hard drive. This also offers the added benefit of data backup and accessibility from multiple devices.
Another good practice is to archive older projects onto an external hard drive.
So you’re thinking about downloading Adobe Creative Cloud? It’s a pretty sweet deal, giving you access to a ton of apps. But don’t sleep on the PDF capabilities; you’ll probably want to check out adobe acrobat dc for serious PDF editing and management. Once you’ve got that sorted, you’ll be all set to fully utilize your Adobe Creative Cloud download and conquer any creative project.
Moving and Deleting Applications
Moving applications within your system is generally not recommended, as it can disrupt functionality. However, uninstalling applications you don’t need is straightforward. You can typically do this through the operating system’s application manager (like the Control Panel in Windows or the Applications folder in macOS). This will remove the application and free up the space it was occupying.
Remember to back up any important project files before uninstalling an application. If you simply want to temporarily disable an application without uninstalling it, you can often do this through the Creative Cloud desktop application.
Security and Privacy Considerations
Downloading and using Adobe Creative Cloud software involves entrusting your data and system to Adobe’s infrastructure. Understanding the security measures in place and taking proactive steps to protect your account is crucial for a safe and productive experience. This section Artikels key aspects of Adobe’s security practices and provides guidance on safeguarding your information.Adobe employs a multi-layered approach to security, protecting user data throughout the download, installation, and usage processes.
This includes robust encryption protocols during transmission, secure storage of user data in their servers, and regular security audits to identify and address vulnerabilities. Furthermore, Adobe actively monitors for malicious activity and implements updates to counter emerging threats. They also adhere to various industry-standard security frameworks and regulations to ensure data privacy and protection.
Adobe’s Security Measures
Adobe utilizes a combination of technologies to secure user data and software. Data transmitted between your computer and Adobe’s servers is encrypted using HTTPS, preventing unauthorized access. Their servers are protected by firewalls and intrusion detection systems, constantly monitored for suspicious activity. Regular security assessments and penetration testing help identify and mitigate potential weaknesses in their systems.
Adobe also implements access control measures, limiting access to user data based on roles and responsibilities within the company. Finally, they maintain a rigorous software development lifecycle, incorporating security best practices throughout the process to minimize vulnerabilities in their applications.
Verifying Software Legitimacy
Ensuring you download legitimate Adobe Creative Cloud software is paramount to avoid malware and security risks. Always download software directly from the official Adobe website. Avoid third-party download sites or torrents, as these often contain modified or malicious versions of the software. Verify the downloaded file’s digital signature to confirm its authenticity. This involves checking the file’s digital certificate, which should be issued by Adobe.
Furthermore, be cautious of emails or messages claiming to offer Adobe software for free or at a heavily discounted price, as these are often scams.
Protecting Your Adobe Creative Cloud Account
Protecting your Adobe Creative Cloud account requires a multi-pronged approach. Start by choosing a strong, unique password that combines uppercase and lowercase letters, numbers, and symbols. Avoid using the same password for multiple accounts. Enable two-factor authentication (2FA) to add an extra layer of security. This requires a secondary verification method, such as a code sent to your phone, in addition to your password.
Regularly review your account activity for any unauthorized access. Be wary of phishing emails or websites attempting to steal your login credentials. Never share your account credentials with anyone. Keep your computer’s operating system and antivirus software up to date to protect against malware. Finally, be mindful of the information you share online, avoiding posting sensitive details that could be used to compromise your account.
Licensing and Activation
Getting your Adobe Creative Cloud apps up and running involves understanding your license and activating the software. This process is generally straightforward, but knowing the different license types and how to manage them across devices can save you headaches down the line.Adobe Creative Cloud licenses come in a few different flavors, each tailored to different needs and budgets. Individual licenses are perfect for solo artists or designers, while team licenses allow multiple users within an organization to access the software.
Enterprise licenses offer even more robust features and management capabilities for large-scale deployments. Understanding which license type you have is crucial for managing your access and permissions.
License Types
The various license types are designed to accommodate individual users, small teams, and large organizations. Individual licenses grant access to the software for a single user on a limited number of devices. Team licenses are perfect for collaborative environments and offer centralized management capabilities. Enterprise licenses provide comprehensive administration features, security controls, and volume licensing discounts. Choosing the right license type depends on your specific needs and budget.
Software Activation
Activating your Adobe Creative Cloud software is usually a simple process. After the download completes, you’ll typically be prompted to sign in with your Adobe ID and password. This verifies your license and grants you access to the software. In some cases, an activation code might be required, which is usually provided during the purchase process. If you encounter any problems during activation, checking your internet connection and ensuring you’re using the correct credentials is a good first step.
Adobe’s help documentation also offers troubleshooting tips for activation issues.
Managing Licenses Across Multiple Users or Devices
Managing licenses for multiple users or devices requires a slightly different approach depending on the license type. For individual licenses, you’ll be able to sign in on a limited number of devices. If you need to access your software on a new device, you might have to deactivate it on an older one. For team and enterprise licenses, Adobe offers administrative tools to manage user access, software deployments, and license assignments.
These tools allow for centralized control and tracking of licenses across the organization. This ensures compliance and efficient resource management.
Compatibility with Different Operating Systems
So, you’re ready to dive into the Adobe Creative Cloud, but you’re wondering if it’ll play nice with your computer’s operating system? No worries, we’ve got you covered. This section breaks down which operating systems are compatible and addresses any potential hiccups you might encounter. Knowing this beforehand can save you a ton of troubleshooting time later.Adobe Creative Cloud applications are designed to work across a range of operating systems, but the specific versions supported can vary depending on the individual application (Photoshop, Illustrator, Premiere Pro, etc.).
Generally, Adobe prioritizes compatibility with the latest versions of major OSes, offering the best performance and features. However, older versions might still work, but with potential limitations in functionality or performance. It’s always best to check Adobe’s official system requirements page for the most up-to-date information before downloading.
Supported Operating Systems
The main operating systems supported by Adobe Creative Cloud include Windows and macOS. Specific versions supported will vary depending on the software and will be listed on Adobe’s website. For instance, while a newer version of Photoshop might require Windows 11, an older version might still be compatible with Windows 10. Always check the system requirements before installing any Adobe Creative Cloud application.
Potential Compatibility Issues and Solutions
Compatibility problems can arise from several factors, including outdated drivers, insufficient system resources (RAM, storage), or conflicts with other software.
- Outdated Drivers: Outdated graphics drivers are a common culprit. Updating to the latest drivers from your graphics card manufacturer (Nvidia, AMD, or Intel) can often resolve performance issues or crashes. For example, if you’re experiencing glitches in Photoshop, updating your Nvidia drivers might fix the problem.
- Insufficient System Resources: Adobe Creative Cloud applications are resource-intensive. If your system lacks sufficient RAM or storage space, you may encounter slowdowns, crashes, or inability to open large files. Upgrading your RAM or freeing up disk space can significantly improve performance. For instance, if you’re editing large video files in Premiere Pro, having at least 16GB of RAM is recommended.
If your hard drive is almost full, it can severely impact performance.
- Software Conflicts: Conflicts with other software can sometimes interfere with Adobe applications. Try closing unnecessary programs before launching Adobe applications to minimize conflicts. If a specific program seems to be causing problems, you might need to uninstall it or look for compatibility solutions online.
- Operating System Version: Using an unsupported operating system version can lead to various problems, from application crashes to complete failure to launch. Always check Adobe’s system requirements to ensure your OS is compatible. For example, attempting to run the latest version of After Effects on an extremely old version of macOS could lead to severe compatibility issues.
Finding Solutions
Adobe’s website and support forums are excellent resources for troubleshooting compatibility issues. Searching for specific error messages or problems will often lead to solutions provided by Adobe or other users. Additionally, checking Adobe’s system requirements page for the specific application you’re using is crucial for ensuring compatibility.
Using the Adobe Creative Cloud Desktop Application
The Adobe Creative Cloud desktop app is your central hub for managing all your Creative Cloud subscriptions and installed software. It’s more than just a download manager; it’s a powerful tool for keeping your creative software updated, managing your cloud storage, and accessing helpful resources. Think of it as your mission control for your entire Adobe creative workflow.The application provides a streamlined interface for accessing and managing all aspects of your Creative Cloud experience, from installing new applications to troubleshooting issues.
Understanding its features and functions is key to maximizing your productivity and ensuring a smooth creative process.
Adobe Creative Cloud Desktop Application Features and Functions
The Creative Cloud desktop app offers a range of features designed to simplify the management of your Adobe software and cloud storage. Key functionalities include installing and updating applications, managing cloud storage space, accessing learning resources, and troubleshooting potential problems. The app’s intuitive design allows for quick navigation and easy access to essential tools. For example, you can quickly check for updates, see how much storage space you have remaining, and even access tutorials directly from the application.
Managing Installed Software, Updates, and Storage
Managing your Adobe software, updates, and storage is straightforward within the Creative Cloud desktop application. The application displays a list of all your installed applications, allowing you to easily launch them. It also automatically checks for and installs updates, ensuring you always have access to the latest features and bug fixes. The app provides a clear overview of your cloud storage usage, alerting you when you are nearing your storage limit.
You can also manage your storage preferences and upgrade your plan if needed directly through the application.
Navigating the Adobe Creative Cloud Desktop Application Interface
Navigating the Creative Cloud desktop application is intuitive and user-friendly. Here’s a step-by-step guide:
Step 1: Launch the Adobe Creative Cloud desktop application. This usually involves finding the app icon in your system’s application menu or desktop.
Step 2: Once launched, the main screen typically displays a list of your installed applications, along with quick access to cloud storage information and any available updates.
Step 3: To install new applications, navigate to the “Apps” tab (or similar; the exact name might vary slightly depending on your operating system and the version of the Creative Cloud application). This section usually shows a catalog of available applications included in your subscription plan. Clicking on an application will give you the option to install it.
Step 4: To manage updates, look for an “Updates” section (or similar). The app will usually automatically check for updates, but you can manually check here and install any available updates.
Step 5: To manage your cloud storage, locate the “Storage” section (or similar). This section displays your current storage usage and allows you to manage files and folders stored in the cloud. You might be able to adjust your storage plan from this section as well.
Step 6: Explore the other tabs available, such as “Learn” for tutorials and help documents, or a “Help” section for troubleshooting.
The interface is designed to be self-, but if you encounter any difficulties, the built-in help resources are a great starting point. Remember to regularly check for updates to ensure you’re utilizing the latest features and performance enhancements.
Concluding Remarks
Downloading and installing Adobe Creative Cloud might seem daunting at first, but with a little guidance, it’s a breeze. Remember to check your system requirements, optimize your download speed, and familiarize yourself with the Creative Cloud desktop app. If you run into any snags, don’t panic! We’ve covered common troubleshooting steps, and Adobe support is always there to lend a hand.
Now go forth and unleash your creativity!
FAQ Explained
Can I download individual apps instead of the entire Creative Cloud suite?
Yep! You can choose to download individual apps based on your needs and budget.
What if my download gets interrupted?
Most download managers will let you resume from where you left off. Check your download manager’s settings.
How much storage space do I need?
That depends on the apps you download. It’s a good idea to have plenty of free space on your hard drive.
Is my Adobe Creative Cloud account secure?
Adobe employs strong security measures, but using a strong password and enabling two-factor authentication is always recommended.
What if I have problems with my download?
Check Adobe’s support website for troubleshooting tips or contact their customer support directly.