Corel Draw X7: It’s the graphic design powerhouse that’s been a staple for years, and for good reason! This isn’t your grandma’s drawing program; we’re talking about a robust suite of tools for creating everything from simple logos to incredibly intricate illustrations. Whether you’re a seasoned pro or just starting out, this guide will walk you through the essentials, uncovering hidden gems and helping you master this versatile software.
Table of Contents
From mastering the interface and its various toolbars and dockers to unlocking the power of its drawing tools, text features, and image editing capabilities, we’ll explore every facet of Corel Draw X7. We’ll dive into advanced techniques like using PowerClip for layered designs, efficient layer management, and even troubleshooting those pesky issues that can sometimes crop up. Get ready to level up your design game!
Corel Draw X7 Interface Overview
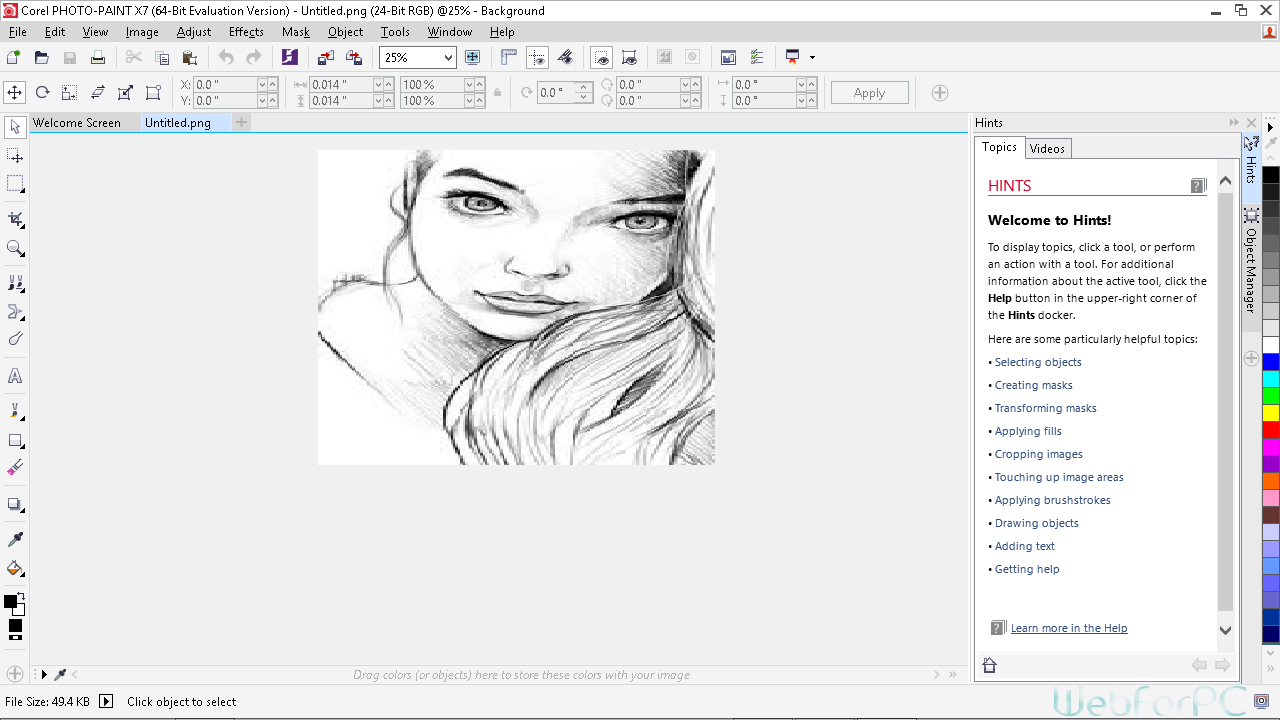
Corel Draw X7 boasts a fairly intuitive interface, though it can seem overwhelming at first glance. Understanding the main components—workspaces, toolbars, the Property Bar, and dockers—is key to mastering the software. This overview will break down each element, helping you navigate the program effectively.
Main Workspaces and Toolbars
Corel Draw X7 offers customizable workspaces, allowing users to tailor the interface to their specific needs. Common workspaces include “Default,” “Page Layout,” and “Web.” Each workspace presents a different arrangement of toolbars and dockers, optimizing the screen for particular tasks. The toolbars themselves, located typically at the top and sides of the screen, provide quick access to frequently used tools like the selection tool, shape tools, and text tools.
These toolbars are highly customizable; users can add, remove, or rearrange tools to suit their workflow.
Property Bar Functionality
The Property Bar, located just below the menu bar, dynamically adapts to the currently selected tool or object. This is a crucial element for controlling the properties of whatever you’re working on. For example, if you select the rectangle tool, the Property Bar will display options to adjust the rectangle’s width, height, corner rounding, and fill color. Selecting a text object will change the Property Bar to display font size, style, color, and kerning options.
Its dynamic nature makes it a central hub for fine-tuning your designs.
Docker Functionality
Dockers are panels that provide access to various program features and settings. They are typically found along the sides or bottom of the screen and can be docked, undocked, or even closed entirely. Key dockers include the “Object Manager” (for managing layers and objects), the “Color Palette” (for selecting and managing colors), and the “Toolbox” (offering a broader range of tools than the toolbars).
Other dockers provide specialized functions, such as managing styles, effects, and more. The ability to customize their visibility and arrangement is a significant advantage for maintaining a clean and efficient workspace.
Ribbon Interface Comparison
Corel Draw X7 introduced a ribbon interface, a significant shift from previous versions. While earlier versions relied primarily on menus and toolbars, X7 incorporated the ribbon to provide a more visual and accessible way to access features. The following table compares the two:
| Feature | Corel Draw X7 (Ribbon) | Previous Corel Draw Versions (Menus & Toolbars) |
|---|---|---|
| Interface Style | Tabbed ribbon with categorized tools and options | Hierarchical menus and separate toolbars |
| Accessibility | More visual and intuitive, easier to find tools | Can be less intuitive, requiring more navigation |
| Customization | Highly customizable, allowing users to add or remove tabs and groups | Customization options limited to toolbar arrangement and menu visibility |
| Screen Real Estate | Can occupy more screen space, especially with expanded ribbons | Generally uses less screen space |
Corel Draw X7 Drawing Tools
Okay, so we’ve covered the basics of the Corel Draw X7 interface. Now let’s dive into the real meat and potatoes: the drawing tools. These are your bread and butter for creating anything from simple logos to complex illustrations. Mastering these tools is key to unlocking Corel Draw’s full potential. Think of them as your digital paintbrushes, pencils, and scalpels.
Pen Tool, Bézier Tool, and Freehand Tool Comparison
These three tools are all about creating vector curves, but they offer different levels of control and precision. The Pen tool gives you the most control, allowing you to precisely place anchor points and adjust curve handles to create perfectly smooth or sharp curves. It’s ideal for precise work like logos or technical drawings. The Bézier tool is very similar, offering a slightly more intuitive way to create curves, especially for those familiar with Bézier curves in other software.
The Freehand tool, on the other hand, is more about quick sketching and organic shapes. You draw directly with your mouse or stylus, and Corel Draw will then intelligently convert your strokes into smooth curves. Think of it as the digital equivalent of a pencil sketch. The Pen tool is for precision, the Bézier tool is a middle ground, and the Freehand tool is for fast, expressive work.
Shape Tools and Their Applications
Corel Draw boasts a variety of shape tools, each designed for specific purposes. These range from simple shapes like rectangles, ellipses, and polygons to more complex tools like stars, spirals, and even custom shapes you can import. The Rectangle tool lets you create, well, rectangles, which can be further modified with rounded corners or adjusted proportions. The Ellipse tool is similar, allowing for the creation of circles and ovals.
The Polygon tool allows for the creation of shapes with three or more sides, offering a great deal of versatility. The Star tool is perfect for creating star-shaped objects with varying numbers of points and levels of sharpness. These basic shapes form the foundation of many designs, often serving as building blocks for more intricate compositions. For example, you might use several rectangles to build a building, or combine ellipses to create a stylized planet.
Using the Knife Tool for Complex Shape Editing
The Knife tool is your digital scalpel. It allows you to cut existing shapes into smaller pieces, creating more complex compositions from simpler elements. Imagine you’ve created a complex logo using several shapes. The Knife tool allows you to slice through those shapes to adjust them precisely, creating intricate details that would be impossible to achieve otherwise. For instance, you could use the Knife tool to cut a perfect half-circle out of a square, creating a unique shape that would be hard to create directly.
This precise control makes the Knife tool invaluable for fine-tuning intricate designs.
Creating Intricate Designs with Combined Drawing Tools
Let’s say you’re designing a stylized flower. You could start by using the Ellipse tool to create the basic shape of the petals, then use the Pen tool to add more intricate details and curves to their edges. You might use the Freehand tool to quickly sketch out the stem and leaves, before refining their shapes with the Bézier tool.
Finally, the Knife tool could be used to remove sections of petals or leaves, adding further depth and complexity to the design. This demonstrates how a combination of these tools, each used for its strengths, allows for the creation of truly intricate and expressive designs. The key is to understand the unique capabilities of each tool and use them strategically to achieve your design goals.
Corel Draw X7 Text and Typography

So, you’ve mastered the basics of Corel Draw X7 – now let’s dive into the world of text and typography! This is where you can really make your designs sing. We’ll cover everything from basic formatting to creating some seriously cool artistic text effects. Get ready to unleash your inner typographer!
Corel Draw X7 offers a robust set of tools for manipulating text, going far beyond simple word processing. You can control every aspect of your text’s appearance, from font and size to kerning, leading, and a whole host of effects. Mastering these tools will allow you to create professional-looking designs with clear and impactful messaging.
Text Formatting Options
Corel Draw X7 provides extensive text formatting capabilities. You can adjust font, size, style (bold, italic, underline), color, and kerning (spacing between individual letters) and tracking (spacing between all letters in a word or block of text) directly within the property bar. Beyond the basics, you can also control leading (the vertical spacing between lines of text), paragraph alignment (left, right, center, justified), and even apply numerous decorative effects like Artikels, shadows, and 3D transformations.
Experimenting with these options will dramatically impact the overall look and feel of your text. For example, a tight kerning can create a more modern and sophisticated feel, while looser kerning can appear more casual and friendly.
Paragraph Styles and Master Pages
Efficient text management is crucial for larger projects. Paragraph styles allow you to define and reuse specific formatting settings. Instead of manually formatting each paragraph, you can simply apply a pre-defined style. This saves time and ensures consistency throughout your design. Master pages take this efficiency a step further.
By setting up your text styles and other design elements on a master page, these elements will automatically appear on all pages of your document. This is particularly helpful for brochures, newsletters, and other multi-page projects where maintaining a consistent look and feel is essential. Think of it like a template for your entire document; any changes to the master page automatically update all linked pages.
Sample Brochure Design
Let’s imagine we’re designing a brochure for a new coffee shop. The cover might feature a large, stylized title using a bold, slightly condensed serif font like “Playfair Display” in a deep brown color, with a subtle drop shadow to give it depth. The tagline, perhaps “Your Daily Dose of Delight,” could be placed beneath it in a smaller, elegant script font like “Great Vibes” in a lighter brown.
Inside, body text could use a clean sans-serif font like “Open Sans” in a readable size, perhaps with a light gray color for improved readability. Different sections, like “Our Coffee,” “Pastries,” and “Location,” could each use a unique heading style, possibly with a slightly different color or font weight to create visual hierarchy and guide the reader’s eye.
We might even use a decorative border around certain sections to add visual interest.
Artistic Text Effects and Drop Shadows
Corel Draw X7 offers a wealth of options for creating artistic text effects. You can easily add Artikels, bevels, embossing, and other 3D effects to give your text a unique look. Drop shadows are a simple yet effective way to make text stand out and add depth. To create a drop shadow, simply select your text, go to the “Effects” menu, choose “Shadow,” and adjust the settings to control the shadow’s offset, blur, and color.
For more advanced effects, consider experimenting with the “Envelope” tool to warp text around shapes or use the “PowerClip” tool to embed text within other objects. Imagine curving text along the shape of a coffee cup or making the text appear as if it’s embossed on a coffee bean – the possibilities are nearly endless!
Corel Draw X7 Image Editing Capabilities
Corel Draw X7, while primarily a vector graphics editor, packs a surprisingly robust set of image editing tools. These tools allow users to seamlessly integrate raster images into their projects, retouch photographs, and manipulate image properties for optimal results. Understanding these capabilities is crucial for creating polished and professional designs.
Image Editing Tools and Their Functions
Corel Draw X7 offers a comprehensive suite of image editing tools accessible through the “Image” menu and the contextual toolbar that appears when an image is selected. These tools allow for a wide range of manipulations, from simple adjustments to complex retouching. Key tools include the “Power Clip” function, allowing for the masking and shaping of images within other objects, the “Transparency” tool for adjusting the opacity of images, and various adjustment tools for color, brightness, and contrast.
The “Retouch” tools, similar to those found in dedicated photo editors, offer capabilities such as blemish removal, sharpening, and blurring. Beyond these specific tools, the standard selection tools also provide the ability to crop, scale, and rotate images precisely.
Adjusting Image Color, Brightness, and Contrast
Modifying color, brightness, and contrast is fundamental to image editing. Corel Draw X7 provides several methods for these adjustments. The simplest approach uses the “Brightness/Contrast” adjustment within the “Image” menu. This allows for quick, intuitive modifications by dragging sliders to adjust the desired values. For more precise control, users can access the “Adjust Color” dialog box, offering a wide array of options including hue/saturation adjustments, color balance control, and curve editing for granular color manipulation.
These adjustments allow users to correct overexposed or underexposed photos, enhance color saturation, or create specific stylistic effects. For example, increasing contrast can make an image appear more dramatic, while reducing brightness can create a moody atmosphere.
Image Import and Export Formats
Corel Draw X7 supports a wide array of image import and export formats, ensuring compatibility with various applications and workflows. Commonly supported import formats include JPEG, TIFF, PNG, GIF, and BMP. Each format has its strengths and weaknesses. JPEG is a lossy format ideal for web use due to its smaller file sizes, while TIFF and PNG offer lossless compression, preserving image quality better but resulting in larger file sizes.
GIF is limited to 256 colors but supports animation. BMP is a simple, uncompressed format. Export options generally mirror the import capabilities, allowing for flexibility in choosing the optimal format based on the intended use and desired level of quality. For example, exporting a high-resolution image for print would typically use TIFF, while exporting an image for web use would utilize JPEG.
So, Corel Draw X7 is awesome for vector graphics, right? But sometimes you need to get text from an image, especially if you’re scanning in old flyers or something for a project. That’s where a photo to text converter comes in handy; it’s a lifesaver for quickly grabbing that text and then you can easily import it into your Corel Draw X7 file for editing.
Seriously, it speeds up the workflow a ton.
Retouching a Photograph: A Step-by-Step Guide
This guide demonstrates retouching a portrait photograph. Assume the photograph has minor blemishes and slightly uneven lighting.
- Import the Image: Open Corel Draw X7 and import the photograph using the “Import” function (File > Import).
- Preliminary Adjustments: Use the “Brightness/Contrast” adjustment to balance the lighting. Adjust brightness and contrast sliders to achieve a more even exposure.
- Blemish Removal: Utilize the “Clone Brush” tool (found within the Retouch toolbox) to carefully remove any blemishes or imperfections. Sample a clean area of skin near the blemish, then paint over the imperfection to blend it seamlessly.
- Sharpening: Apply sharpening to enhance details. Use the “Sharpen” tool, adjusting the intensity to avoid over-sharpening, which can lead to a grainy or unnatural appearance.
- Color Correction (Optional): If needed, fine-tune the colors using the “Adjust Color” dialog box. Adjust hue, saturation, and color balance to create a more vibrant and natural look.
- Export: Once satisfied, export the retouched image in the desired format (e.g., JPEG for web use, TIFF for print) using the “Export” function (File > Export).
Corel Draw X7 Color Management

Color management in Corel Draw X7 is crucial for ensuring consistent and accurate color reproduction across different devices and outputs. Understanding color modes, profiles, and palettes is key to achieving professional-looking results, whether you’re printing high-resolution images or preparing files for web use. Ignoring color management can lead to significant discrepancies between what you see on screen and the final product.Color Modes and Their ApplicationsCorelDRAW X7 supports various color modes, each with its strengths and weaknesses.
Choosing the right mode depends heavily on your project’s intended use.
RGB Color Mode
RGB (Red, Green, Blue) is the additive color model used for displays like monitors and screens. It’s ideal for web graphics, on-screen presentations, and digital projects intended for viewing on electronic devices. RGB uses a combination of red, green, and blue light to create a wide range of colors. The color values range from 0 to 255 for each color component.
For example, (255, 0, 0) represents pure red, (0, 255, 0) represents pure green, and (0, 0, 255) represents pure blue. Mixing these creates other colors; (255, 255, 0) for example, creates yellow.
CMYK Color Mode
CMYK (Cyan, Magenta, Yellow, Key [Black]) is the subtractive color model used for print media. It works by subtracting colors from white light, using inks to create a range of colors on paper. CMYK is essential for print projects such as brochures, posters, and business cards. Unlike RGB, where colors are added, CMYK subtracts light, leading to slightly different color appearances compared to the RGB equivalent.
This is why colors sometimes look different on screen compared to the printed output. A common CMYK color might be C=100, M=0, Y=0, K=0, which would result in a pure cyan.
Pantone Color Mode
Pantone colors are pre-mixed spot colors, each with a specific formula and identification number. They’re used when precise color matching is critical, such as in corporate branding or high-end printing where consistency across different print runs is paramount. Pantone colors offer greater accuracy and control compared to CMYK, but they require special inks and printing processes. A Pantone color, for instance, might be referenced as “Pantone 186 C,” guaranteeing consistency across different print jobs.
Importance of Color Profiles and Their Management
Color profiles are essentially digital descriptions of a color space. They provide information about how colors are represented in a specific device (monitor, printer, scanner). Using appropriate profiles ensures that colors are accurately interpreted and rendered. Without them, colors may appear significantly different from device to device.
Managing Color Profiles in Corel Draw X7
CorelDRAW X7 allows you to assign color profiles to your documents and devices. This is done through the “Color Management” settings, typically found in the application’s preferences or options. By assigning profiles, you’re essentially telling CorelDRAW how to interpret and translate colors to your output device. For example, you would assign an ICC profile for your monitor and another for your printer.
Accurate profile assignment minimizes color discrepancies.
Creating Consistent Color Across Different Projects
Creating consistent color across multiple projects requires careful planning and the use of color palettes.
Using Color Palettes Effectively
Color palettes offer a great way to maintain consistency. By creating and saving custom palettes, you can easily reuse the same colors in different projects. This is particularly useful for branding projects where maintaining a consistent color scheme is vital. CorelDRAW allows you to save palettes in various formats and import them into new documents, ensuring consistent color use.
You can also utilize predefined palettes, such as those based on industry standards or color harmonies. For example, a brand might create a palette with their primary and secondary colors, including shades and tints, to maintain a unified look across all marketing materials.
Corel Draw X7 Effects and Filters
Corel Draw X7 offers a robust suite of effects and filters that allow users to significantly enhance their designs. These tools range from subtle adjustments to dramatic transformations, providing a wide array of creative possibilities for manipulating images and objects. Understanding these tools is key to unlocking the full potential of the software.
Corel Draw X7’s effects and filters are categorized in various ways within the software interface, but generally fall under broad classifications such as distortion, artistic, blur, and noise effects. Each effect offers unique parameters to fine-tune the outcome. Many effects can be layered or combined for complex results, making experimentation a vital part of mastering this aspect of Corel Draw.
Transparency and Blending Modes
Transparency controls the opacity of an object, allowing parts of it to be visible through layers beneath it. Blending modes dictate how the colors of an object interact with the colors of the underlying layers. For instance, setting an object to 50% transparency makes it semi-transparent, revealing the layers below. Using a blending mode like “Multiply” darkens the underlying colors where the object overlaps, while “Screen” brightens them.
Experimenting with different transparency levels and blending modes allows for creative layering and color mixing effects. A common use case is creating a subtle watermark or overlay without completely obscuring the underlying image.
Applying a PowerClip Effect
The PowerClip effect allows you to place an object inside another object, effectively creating a mask or frame. For example, imagine you have a photograph of a person and you want to place them inside a circular frame. Using the PowerClip effect, you can place the photo inside the circle. Only the portion of the photograph that falls within the circle will be visible; the rest will be cropped out.
This effect is incredibly useful for creating sophisticated compositions and adding depth to designs. The process involves selecting the object to be placed inside the other (the photo in this case), then selecting the “PowerClip” option in the Object menu. This allows for precise control over the placement and visibility of the contained object.
Comparing Filter Combinations
Combining different filters can lead to dramatically different results. For example, applying a “Gaussian Blur” filter followed by a “Sharpen” filter might seem counterintuitive, but the result could be a selective sharpening effect, enhancing details while maintaining a soft overall feel. Conversely, applying a “Posterize” filter (which reduces the number of colors) followed by a “Noise” filter creates a distinctly different effect compared to applying them in reverse order or individually.
The order of operations significantly impacts the final outcome, and experimentation is crucial to discover unique and interesting results. Imagine applying a “Watercolor” filter to a photograph; the result would differ considerably from applying a “Sketch” filter. The “Watercolor” filter might soften edges and create a painterly look, while the “Sketch” filter might produce a line-art rendition. The interplay between these filters demonstrates the wide range of artistic possibilities available.
Corel Draw X7 Export Options
So, you’ve painstakingly crafted your masterpiece in Corel Draw X
7. Now comes the crucial step
exporting your work. Choosing the right export format and settings is key to ensuring your design looks its best and functions correctly wherever it’s used – be it a website, a printed brochure, or a screen display. Let’s dive into the options.
Corel Draw X7 offers a wide array of export formats, catering to various needs and applications. Understanding the differences between these formats, especially raster and vector graphics, is essential for making informed decisions about how to best preserve your work’s quality and fidelity.
Supported File Formats
Corel Draw X7 supports a comprehensive range of file formats. This includes industry-standard vector formats like AI (Adobe Illustrator), EPS (Encapsulated PostScript), PDF (Portable Document Format), and its native CDR format. It also handles common raster formats such as JPG (JPEG), PNG (Portable Network Graphics), TIFF (Tagged Image File Format), GIF (Graphics Interchange Format), and BMP (Bitmap). The availability of these options allows for maximum compatibility across different software and platforms.
Exporting to the correct format is crucial for maintaining image quality and compatibility with the intended use. For example, choosing a lossless format like PNG is preferred for web graphics where sharp details are important, while JPG, with its lossy compression, might be more suitable for photographs where a slight loss of quality is acceptable for smaller file sizes.
Raster vs. Vector Formats
The choice between raster and vector formats significantly impacts the final product’s quality and scalability. Raster images, like JPGs and PNGs, are made up of pixels arranged in a grid. Enlarging them results in pixelation and a loss of clarity. Vector images, conversely, are composed of mathematical equations defining lines and curves. They can be scaled to any size without losing quality because they are resolution-independent.
Corel Draw X7 excels at creating vector graphics, making it ideal for logos, illustrations, and designs that need to be scaled without losing sharpness. Using the correct format directly relates to the intended use. For example, a logo needs to be vector-based to allow for scaling without any pixelation, unlike a photograph intended for web use which might benefit from the smaller file size of a raster format.
Export Settings Implications
Export settings significantly influence the final output’s file size, quality, and compatibility. For instance, choosing a higher resolution for a raster image (measured in DPI or PPI) will result in a larger file size but better print quality. Conversely, lower resolution settings are better for web use to reduce download times. For vector formats, compression settings affect file size but not image quality.
Understanding these nuances helps optimize your exports for specific applications. For instance, a high-resolution PDF is essential for professional printing, whereas a smaller, compressed JPG might be suitable for email distribution. The correct choice depends on balancing image quality with file size and compatibility.
Optimizing Images for Web and Print
Optimizing images for web and print requires different approaches. For web images, prioritize smaller file sizes to minimize loading times. Use compressed formats like JPG or PNG-8 (for images with limited colors). For print, higher resolution is key (at least 300 DPI). Lossless formats like TIFF or high-quality JPGs are preferred.
Consider color profiles (like sRGB for web and CMYK for print) to ensure accurate color reproduction across different devices. For example, a website banner will be optimized for quick loading times using a compressed JPEG, while a print advertisement will utilize a high-resolution TIFF file to ensure the sharpest image quality.
Corel Draw X7 PowerClip Feature
PowerClip is a seriously awesome feature in Corel Draw X7 that lets you embed one object inside another, creating complex layered designs with ease. Think of it like a digital matting technique, but way more versatile. It’s a game-changer for creating intricate logos, illustrations, and even photo manipulations. You can essentially build up layers of complexity without the headache of constantly readjusting individual objects.PowerClip functionality allows you to insert objects – be it a simple shape, a complex illustration, or even a photo – into a container object, effectively clipping the contents to the container’s shape.
This creates a non-destructive editing environment, meaning you can always go back and edit the contents of the PowerClip without affecting the container or other elements in your design. This is a massive time saver and helps maintain organization in your projects.
PowerClip Usage in Complex Layered Designs
Let’s say you’re designing a logo that features a circular image within a square frame. Instead of painstakingly masking or manually aligning the image to fit perfectly within the square, you can use PowerClip. First, create your square frame. Then, create your circular image. Select the circular image, then select the square frame.
Go to the Effects menu and choose PowerClip, then “Place inside container.” Boom! Your circular image is neatly clipped to the square. You can then resize, reposition, or even edit the image inside the square without altering the square itself. The flexibility is insane.
Creative Applications of PowerClip
The applications of PowerClip are practically limitless. Imagine creating a complex layered scene with a photo of a person placed inside a speech bubble, and then that speech bubble is placed inside a thought cloud. You could easily achieve this using nested PowerClips, which we’ll cover in the next section. Or, consider a business card design: you might place a company logo (PowerClipped into a shape) on a background image (also possibly PowerClipped into a larger shape).
The possibilities extend to intricate product mockups, where you can place a product image within a realistic packaging design, adding a touch of professionalism and realism. Another example could be creating a unique text effect, where text is PowerClipped into a wavy shape, adding visual interest to typography.
Tutorial: Nesting Multiple PowerClips
To effectively utilize nested PowerClips, you need to understand the process of placing objects inside containers sequentially. Let’s walk through an example: Imagine creating a badge with a company logo inside a circle, and that circle inside a square.
1. Create the square
Draw a square using the rectangle tool. This will be your outermost container.
2. Create the circle
Draw a circle using the ellipse tool. This will be your second container.
3. PowerClip the circle
Select the circle, then select the square. Go to Effects > PowerClip > Place inside container. The circle is now clipped to the square.
4. Create the logo
Create your company logo. This could be a simple shape or a more complex image.
5. PowerClip the logo
Select your logo, then click on the circle (which is now inside the square). Again, go to Effects > PowerClip > Place inside container. The logo is now clipped to the circle, which is clipped to the square.Now you have a logo inside a circle inside a square – a perfectly nested PowerClip design. You can adjust any part of this composition independently: tweak the logo, resize the circle, or change the square’s color – all without affecting the other elements.
This layered approach offers a high degree of control and organizational efficiency. This technique easily scales to multiple layers of nesting for even more complex compositions.
Corel Draw X7 Working with Layers
Layers are, like, the backbone of any decent design in Corel Draw X7. Think of them as transparent sheets stacked on top of each other – you can edit individual elements without messing up the rest of your artwork. This makes complex designs way easier to manage, update, and even just keep track of. Seriously, mastering layers is a game-changer.
Layer Options and Functions
Corel Draw X7 provides a robust set of layer options to help you organize your design. Understanding these options is key to efficient workflow. You can adjust layer visibility, locking layers to prevent accidental edits, changing the stacking order, and even grouping layers for easier manipulation. These features are crucial for managing complex projects and streamlining your design process.
Creating a Sample Design Demonstrating Layer Use
Let’s say we’re designing a simple logo. We’ll use three layers: one for the background, one for the main shape, and one for text.The background layer might contain a simple gradient fill. Imagine a soft, light blue to a slightly darker blue gradient, filling the entire canvas. The next layer will contain the main logo shape – let’s say a stylized, abstract leaf.
This leaf is filled with a vibrant green. This leaf would sit on top of the gradient background. Finally, on the topmost layer, we’d add the company name in a clean, modern font, perhaps a crisp white. Each element is on its own layer, completely independent and easily editable. For example, if we decide the green isn’t quite right, we can change it without affecting the background or text.
We could even easily move the text around without affecting the leaf.
Organizing Layers Effectively: A Step-by-Step Guide, Corel draw x7
Efficient layer organization is vital, especially in complex projects. Here’s a practical approach:
- Name your layers descriptively: Instead of “Layer 1,” “Layer 2,” use names like “Background,” “Logo Shape,” “Text.” This makes identifying and managing layers much easier.
- Group related layers: If you have multiple elements that belong together (e.g., different parts of a logo), group them into a single layer. This simplifies selection and manipulation.
- Use layer locking: Lock layers you’re not currently working on to prevent accidental changes. This is especially useful when collaborating on projects or working on a complex design.
- Adjust layer order: Use the layer manager to rearrange layers as needed. Elements on top layers will appear in front of elements on lower layers.
- Utilize layer effects: Experiment with layer effects such as transparency, shadows, and glows to add depth and visual interest to your design. Remember that these effects are applied to the entire layer, so grouping similar elements is important.
- Regularly clean up: Delete unused layers to keep your file size manageable and your workspace clean. A cluttered layer palette is a nightmare to work with.
Following these steps will help you keep your Corel Draw X7 projects organized, efficient, and less prone to frustrating errors. Proper layer management is key to a smooth and productive design workflow.
Corel Draw X7 Shortcuts and Efficiency Tips
Let’s face it, mastering Corel Draw X7 isn’t just about knowing the tools; it’s about workingsmart*. This section dives into keyboard shortcuts and workflow strategies that will dramatically boost your productivity and help you conquer even the most complex design projects. Think of it as your secret weapon for becoming a Corel Draw ninja.
Efficiency in Corel Draw X7 hinges on a combination of understanding the software’s functionality and leveraging its built-in tools and shortcuts. By adopting these strategies, you’ll find yourself completing projects faster, with less frustration, and leaving more time for the creative aspects of your work.
Useful Keyboard Shortcuts
Keyboard shortcuts are your best friend in Corel Draw X7. They significantly reduce the time spent navigating menus and toolbars. Mastering these will make a huge difference in your workflow.
| Shortcut | Action | Shortcut | Action |
|---|---|---|---|
| Ctrl+Z | Undo | Ctrl+Y | Redo |
| Ctrl+C | Copy | Ctrl+X | Cut |
| Ctrl+V | Paste | Ctrl+A | Select All |
| Ctrl+S | Save | Ctrl+P | |
| Delete | Delete selected object | Spacebar | Select the Pick tool |
| F4 | Repeat last action | Ctrl + Shift + S | Save As |
| Ctrl + D | Duplicate selected object | Ctrl + G | Group selected objects |
| Ctrl + U | Ungroup selected objects | Alt + Drag | Create a copy of a selected object |
| Ctrl + 1 | Show/Hide Dockers | Ctrl + 0 | Zoom to 100% |
| Esc | Cancel current operation | Tab | Cycle through tools in the toolbox |
Time-Saving Tips for Efficient Work
Beyond shortcuts, there are several techniques that can significantly streamline your Corel Draw workflow. These tips focus on optimizing your approach to design tasks.
- Organize your workspace: Keep your toolbars and dockers neatly arranged for easy access. Customize your workspace to reflect your preferred workflow.
- Use layers effectively: Group related objects onto layers to maintain a clear and organized structure. This makes editing and manipulating elements much easier.
- Master the Object Manager: Learn how to efficiently use the Object Manager docker to select, arrange, and manipulate objects. It’s invaluable for complex designs.
- Utilize templates: Start new projects with pre-designed templates to save time on basic setups. This is particularly useful for consistent branding.
- Employ non-destructive editing: Whenever possible, use techniques that allow you to easily revert changes, such as using adjustment layers and working with copies of objects.
Improving Workflow Techniques
A well-structured workflow can significantly improve your efficiency and reduce errors. Here are some strategies for improving your overall Corel Draw process.
- Plan your design: Before starting, sketch out your ideas or create a rough draft to avoid unnecessary revisions later on.
- Use guides and grids: Guides and grids help maintain consistency and alignment in your designs, leading to a more polished final product.
- Regularly save your work: This prevents potential data loss due to unexpected crashes or power outages. Develop a habit of saving frequently (e.g., every 5-10 minutes).
- Take breaks: Stepping away from your work periodically helps prevent burnout and allows you to return with fresh eyes and a renewed perspective.
- Learn from others: Explore online tutorials, watch videos, and participate in online communities to learn new techniques and shortcuts.
Corel Draw X7 Cheat Sheet
This cheat sheet provides a quick reference for commonly used tools and their corresponding shortcuts. Keep it handy for a rapid boost in your productivity.
| Tool | Shortcut/Action | Tool | Shortcut/Action |
|---|---|---|---|
| Pick Tool | Spacebar | Shape Tool | F10 |
| Freehand Tool | F5 | Rectangle Tool | M |
| Ellipse Tool | E | Text Tool | F8 |
| Zoom Tool | Z | Hand Tool | H |
Corel Draw X7 Troubleshooting Common Issues
So, you’re diving into the world of Corel Draw X7, and things aren’t going exactly as planned? Don’t worry, it happens to the best of us. This section will cover some of the most common headaches encountered by Corel Draw X7 users, along with practical solutions to get you back on track creating awesome designs. We’ll tackle everything from frustrating error messages to the dreaded program crash.
Troubleshooting Corel Draw X7 often involves a systematic approach. Start by identifying the specific problem – is it a file corruption issue, a compatibility problem, or something else entirely? Then, try the simplest solutions first, working your way up to more complex fixes. Remember to save your work frequently to avoid losing progress!
File Corruption and Data Loss
File corruption can manifest in various ways, from a program freeze to a file that simply won’t open. This can be caused by several factors, including sudden power outages, insufficient disk space, or even corrupted installation files. The first step is always to try opening the file in a different application, such as a text editor if it’s a simple file.
If the file is heavily corrupted, recovery may be impossible. If you have an older version of the file, that’s your best bet. Preventing this issue is crucial – always save your work frequently, especially on a separate hard drive or cloud storage service. Regular backups are your best defense against data loss.
Compatibility Issues
Corel Draw X7 might encounter compatibility problems with older or newer operating systems, drivers, or other software. For example, outdated graphics drivers can lead to rendering issues or crashes. Updating your graphics drivers to the latest version from the manufacturer’s website (Nvidia, AMD, Intel) is a common fix. Similarly, ensure your operating system is up-to-date with the latest patches and updates.
In some cases, compatibility issues might require adjusting the program’s settings or using compatibility mode for older operating systems.
Error Messages and Their Meanings
Corel Draw X7 provides error messages that offer clues about the underlying problem. For example, a “memory allocation error” indicates that the program doesn’t have enough RAM to complete a task. This can be solved by closing unnecessary programs, increasing your computer’s RAM, or simplifying your design. An “invalid file format” error means the program can’t recognize the file type.
Make sure you’re opening the correct file type (.cdr, .jpg, etc.). “Insufficient disk space” is self-; free up space on your hard drive. Always note the specific error message and search online for solutions tailored to that particular message.
Reinstalling or Updating Corel Draw X7
Reinstalling Corel Draw X7 can often resolve various issues, especially if the initial installation was corrupted. Before reinstalling, completely uninstall the program using the Control Panel’s Add or Remove Programs feature. Then, download the latest version of the installer from the official Corel website and follow the on-screen instructions. Ensure you have administrator privileges to install the software properly.
Updating to the latest version of Corel Draw X7 can often resolve bugs and compatibility issues. Check the Corel website for updates and follow the instructions for applying the update. Always back up your important files before undertaking major software changes.
Outcome Summary: Corel Draw X7
So, there you have it – a comprehensive look at Corel Draw X7! From the basics of navigating the interface to mastering advanced techniques like PowerClip and efficient layer management, we’ve covered a lot of ground. Remember, practice makes perfect, so don’t be afraid to experiment, explore the different tools, and let your creativity run wild. With Corel Draw X7, the possibilities are truly limitless.
Now go create something amazing!
Essential Questionnaire
Is Corel Draw X7 compatible with Macs?
Nope, Corel Draw X7 is only available for Windows.
What’s the difference between Corel Draw X7 and newer versions?
Newer versions offer improved performance, updated interfaces, and often include new features and tools. However, X7 is still a capable program.
Can I use Corel Draw X7 for web design?
Absolutely! You can export your designs in various web-friendly formats like PNG, JPG, and SVG.
How much does Corel Draw X7 cost?
Pricing varies depending on the retailer and any ongoing sales, so check online for the latest deals.
Where can I find tutorials and support for Corel Draw X7?
Corel’s website offers plenty of resources, and you can also find tons of tutorials on YouTube and other online platforms.