Videoscribe: It’s the animation software that’s taken the internet by storm, letting anyone create whiteboard-style explainer videos, engaging marketing materials, and even quirky educational content. From simple animations to complex narratives, Videoscribe offers a surprisingly intuitive workflow, making professional-looking videos accessible to beginners and pros alike. This guide dives deep into everything you need to know to master this powerful tool.
Table of Contents
We’ll cover the software’s core features, explore various project types, and walk you through creating your first animation. We’ll compare Videoscribe to similar software, helping you decide if it’s the right fit for you. Plus, we’ll tackle advanced techniques, troubleshooting common issues, and even peek into the future of Videoscribe and similar animation technologies. Get ready to unleash your inner animator!
Videoscribe Software Overview
Videoscribe is a whiteboard animation software that allows users to create engaging and visually appealing videos with minimal technical skill. It’s known for its intuitive interface and ease of use, making it accessible to both beginners and experienced animators. The software streamlines the process of creating professional-looking whiteboard animations, reducing the time and effort typically associated with traditional animation methods.Videoscribe’s core functionality centers around the use of pre-made images, text, and hand-drawn elements to build animations.
Users can import their own assets or utilize the extensive library of images and sounds provided within the software. The software automatically creates the animation, allowing users to focus on the creative aspects of their project. Key features include a robust library of images and sounds, easy-to-use animation tools, and the ability to export videos in various formats.
Project Types
Videoscribe is versatile and can be used to create a wide array of video projects. The software’s flexibility allows for adaptation across numerous applications. For example, users can create explainer videos to clearly communicate complex information, marketing videos to promote products or services, educational videos for teaching concepts, and even short animated stories for entertainment. The possibilities are largely limited only by the user’s creativity and the assets they choose to incorporate.
Think of product demos, training modules, or even short, quirky animated advertisements – all feasible within Videoscribe’s capabilities.
User Interface and Workflow
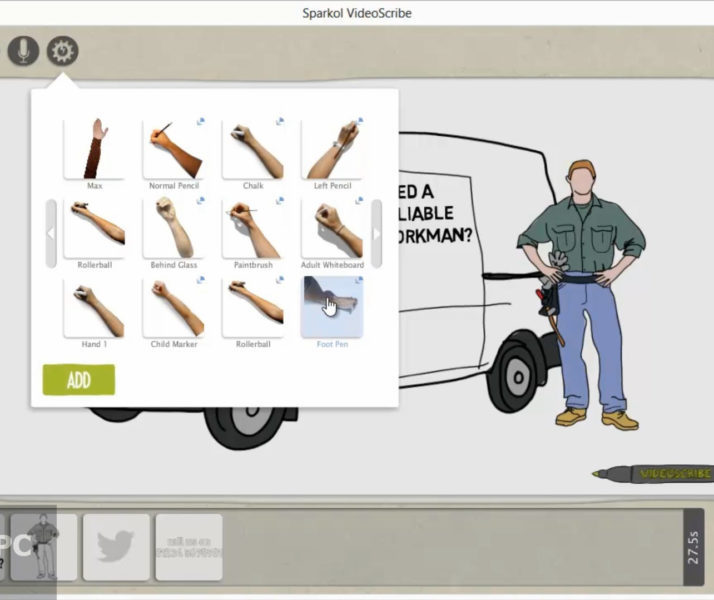
The Videoscribe interface is designed to be user-friendly, with a clean and intuitive layout. The main workspace displays the animation canvas, where users can add and arrange elements. A sidebar provides access to the library of images, sounds, and other assets. Tools for adjusting element properties, such as size, position, and animation speed, are easily accessible. The workflow generally involves selecting assets from the library, placing them on the canvas, adjusting their properties, and then setting the animation timing.
Videoscribe handles the technical aspects of animation, such as creating smooth transitions and realistic hand-drawn effects, allowing the user to focus on the narrative and visual design of their video. A timeline allows for precise control over the timing and sequencing of animation elements. The export process is straightforward, offering various resolutions and formats to suit different needs.
The software guides users through each step of the process, making it simple to create professional-quality animations even without prior experience in video editing or animation.
Videoscribe Tutorials and Learning Resources
So, you’re ready to dive into the world of Videoscribe? Awesome! Getting started can feel a little overwhelming, but with the right resources, you’ll be creating engaging whiteboard animations in no time. This section will point you towards some excellent tutorials and learning materials to help you master this awesome software.Learning Videoscribe effectively involves a combination of exploring the software’s features directly and supplementing that with high-quality tutorials.
Many resources are available online, ranging from short, focused videos to comprehensive courses. Choosing the right resources depends on your learning style and your current skill level. We’ll cover some top choices here.
Reputable Online Resources for Learning Videoscribe
Finding reliable information is key. Many YouTube channels and websites offer Videoscribe tutorials, but quality varies greatly. Sticking to official channels and those with proven track records is always a good idea. For example, the official Videoscribe website itself often features helpful guides and support documentation. Additionally, searching YouTube for “Videoscribe tutorial for beginners” will yield a plethora of results, but carefully check the upload date, view count, and comments to gauge the tutorial’s quality and relevance.
Many experienced users also create their own tutorials, showcasing unique techniques and workflows.
Examples of Effective Videoscribe Tutorials for Beginners
Effective tutorials for beginners typically focus on the fundamentals: importing images, adding text, utilizing the drawing hand, and creating basic animations. A good tutorial will explain these concepts clearly and concisely, with visual examples. For instance, a helpful tutorial might start by showing how to import a simple logo, then demonstrate adding a text box and animating its appearance.
Another effective element would be showing how to use the drawing hand to create a simple line drawing, demonstrating different drawing speeds and styles. A good tutorial will also explain how to adjust the timing of animations to create a smooth and engaging video. Many tutorials also include tips and tricks for optimizing your workflow and achieving professional-looking results.
Step-by-Step Guide on Creating a Simple Videoscribe Animation
Let’s create a simple animation: Imagine we’re making a short intro for a bakery.
- Import Assets: Begin by importing a logo image of the bakery and some relevant images (e.g., a croissant, a loaf of bread). Ensure these images are high-resolution for optimal quality.
- Create a Background: Choose a simple, uncluttered background. A solid color or a subtle texture works best for a clean look.
- Add Text: Add text elements like “Welcome to [Bakery Name]” and a tagline. Experiment with different fonts and sizes to create a visually appealing title card.
- Animate the Elements: Start by having the logo appear first, perhaps with a gentle zoom or fade-in effect. Then, introduce the text elements one by one, again using subtle animation. Finally, animate the appearance of the bakery items, perhaps having them “draw” onto the screen using the drawing hand feature.
- Add Sound: Incorporate a short, upbeat sound effect or a background music track to enhance the overall experience. This can be found through royalty-free music sites.
- Render and Export: Once everything is in place, render the animation at a suitable resolution (e.g., 1080p) and export the video in a common format like MP4.
This simple animation will showcase the core features of Videoscribe and provide a solid foundation for more complex projects. Remember to practice and experiment; the best way to learn is by doing!
Comparing Videoscribe to Similar Software

So, you’re thinking about making whiteboard animations, huh? That’s awesome! But with a bunch of software options out there, choosing the right one can feel overwhelming. Let’s dive into how Videoscribe stacks up against the competition. We’ll look at features, pricing, and ease of use to help you decide if it’s the perfect fit for your project.
Choosing animation software depends heavily on your skill level, budget, and the type of animation you want to create. Videoscribe excels in its simplicity and user-friendliness, but other tools offer more advanced features and creative control. Understanding these differences is key to making the right choice.
Videoscribe Feature Comparison
Here’s a quick comparison of Videoscribe with some other popular animation software. Keep in mind that features and pricing can change, so always check the official websites for the most up-to-date information.
| Software Name | Key Features | Pricing | Ease of Use |
|---|---|---|---|
| Videoscribe | Whiteboard animation, pre-made templates, library of images and sounds, intuitive interface | Subscription or one-time purchase options available | Very easy; great for beginners |
| Adobe After Effects | Extremely powerful animation software, wide range of effects and tools, motion graphics, compositing | Subscription (part of Creative Cloud) | Steep learning curve; requires significant experience |
| Vyond (formerly GoAnimate) | Character animation, customizable characters and scenes, easy-to-use interface | Subscription-based | Relatively easy; good for beginners and intermediate users |
| Animaker | Variety of animation styles (whiteboard, 2D, 2.5D, etc.), character animation, templates | Subscription-based | Moderate learning curve; user-friendly but offers advanced features |
Strengths and Weaknesses of Videoscribe
Videoscribe shines in its simplicity and ease of use. It’s perfect for beginners who want to create professional-looking whiteboard animations quickly and without a lot of technical expertise. The pre-made templates and large library of assets are huge time-savers. However, its limited animation capabilities compared to more advanced software like After Effects might be a drawback for users seeking highly complex or stylized animations.
Target User Base Comparison
Videoscribe’s target audience is primarily individuals and small businesses needing an easy-to-use tool for creating engaging explainer videos, marketing materials, or educational content. Users who are new to animation or lack extensive design skills will find it particularly beneficial. In contrast, Adobe After Effects is aimed at professional animators, motion graphic designers, and video editors who need advanced tools and creative control.
Vyond and Animaker target a broader audience, catering to both beginners and those with some animation experience, offering a balance between ease of use and advanced features.
Videoscribe Templates and Assets
Videoscribe offers a pretty sweet selection of templates and assets to help you get started quickly, whether you’re a total newbie or a seasoned pro. They range from simple, clean designs perfect for explainer videos to more elaborate, animated templates suitable for marketing campaigns or educational content. Knowing how to leverage these, and how to add your own custom stuff, is key to making awesome videos.The beauty of Videoscribe is its flexibility.
Videoscribe’s awesome for making explainer vids, but sometimes you need to get those final edits polished. That’s where having access to acrobat dc comes in handy for tweaking the PDF versions of your scripts before final rendering. After you’ve used Acrobat to perfect your scripts, you can get back to making killer videos with Videoscribe.
You’re not locked into using only their pre-made templates; you can easily integrate your own images, illustrations, and even videos to create truly unique projects. This lets you maintain a consistent brand aesthetic or tailor your video perfectly to your specific needs.
Template Variety
Videoscribe provides a library of pre-designed templates categorized by style and purpose. You’ll find options for everything from business presentations and product demos to social media posts and educational materials. Many templates come with placeholder text and images, allowing you to quickly customize them with your own content. The style ranges from minimalist and modern to more playful and illustrative.
Think clean lines and simple animations for a corporate video, or vibrant colors and quirky characters for something more engaging for a younger audience. The availability and specifics of the templates may change, so checking the Videoscribe website for the most up-to-date information is always a good idea.
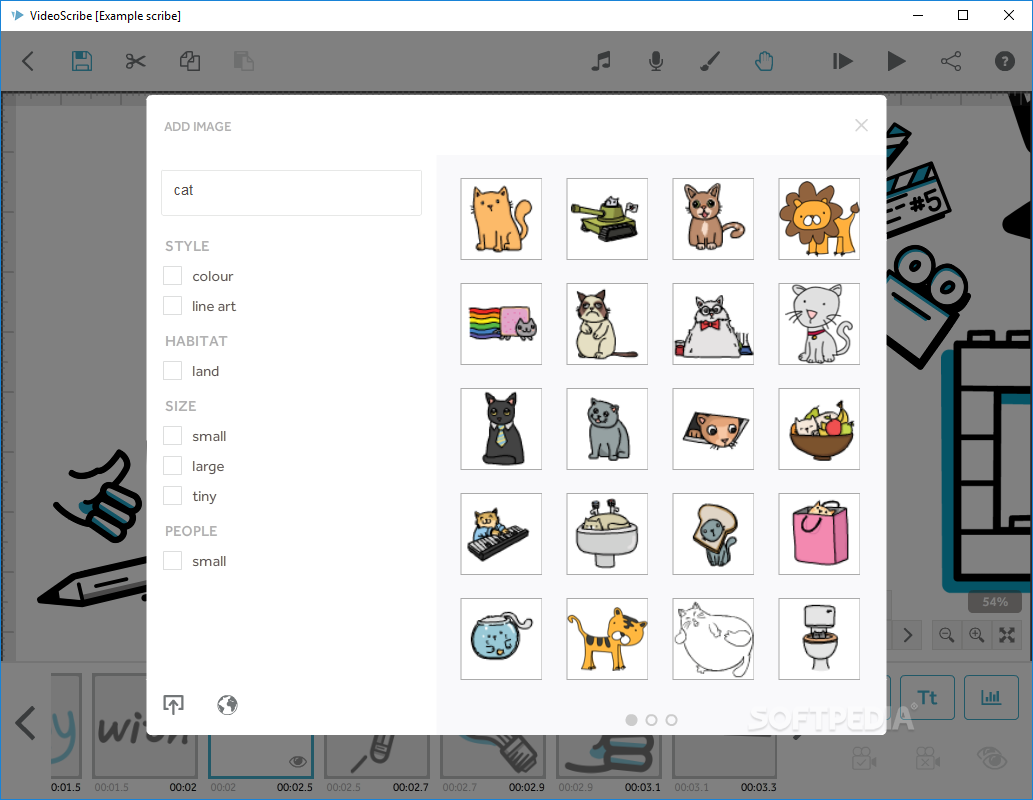
Importing and Using Custom Assets
Adding your own custom assets is a straightforward process. Simply navigate to the “Import” function within the Videoscribe software. You can import various file types, including images (JPG, PNG, SVG), videos (MP4), and audio files (MP3, WAV). Once imported, these assets appear in your library, ready to be dragged and dropped onto your canvas. Remember to ensure your images are high-resolution to maintain a professional look.
For videos, shorter clips work best to avoid lengthy render times. If you’re using illustrations, make sure they’re vector-based (like SVGs) for scalability without losing quality. Videoscribe handles most common file types well, but it’s always a good idea to test a small sample before importing a large batch of assets.
Designing a Simple Product Explainer Template
Let’s say we’re making a product explainer video for a new type of smart coffee mug. Our template would start with a clean, white background. We’d then import a high-resolution image of the mug itself, centrally positioned. Next, we’d add text boxes, using a simple, easy-to-read font, to highlight key features: “Temperature Control,” “Keeps Coffee Hot for Hours,” “Leak-Proof Design.” Each feature would be accompanied by a short, animated sequence.
For “Temperature Control,” we might show a thermometer graphic rising and falling smoothly. For “Keeps Coffee Hot,” we might show a steaming cup icon persisting for a longer duration. “Leak-Proof Design” could feature a graphic of a liquid remaining contained within the mug. The overall animation would be slow and deliberate, allowing viewers to absorb the information without feeling overwhelmed.
We’d use a calming background music track to enhance the viewer experience and create a professional, polished final product.
Advanced Techniques in Videoscribe
Videoscribe, while user-friendly, offers a surprising depth for creating truly engaging animations. Moving beyond the basics unlocks powerful tools for crafting sophisticated visuals and polished productions. This section explores techniques to elevate your Videoscribe projects to a professional level.
Mastering advanced features allows you to create complex animations that capture attention and effectively communicate your message. The key is understanding how different features interact and building upon the fundamentals you’ve already learned. By combining these techniques, you can transform simple ideas into captivating videos.
Complex Animation Creation
Videoscribe’s strength lies in its simplicity, but this simplicity belies its capability for complex animations. Achieving this involves a thoughtful approach to layering, timing, and the strategic use of effects. For instance, you can create a sense of depth by using parallax scrolling, where background elements move slower than foreground elements, creating a 3D illusion. Similarly, carefully choreographed entry and exit animations for your images and text, using a variety of effects like fade-in, zoom, and bounce, will significantly improve the visual appeal.
Mastering the timing of these animations is crucial; using the timeline effectively, and experimenting with different easing functions, allows for smooth and natural-looking movement. Consider using multiple layers to create more complex scenes, with each layer containing specific elements that move independently.
Sound Effects and Music Integration
Adding audio significantly enhances the viewing experience. Videoscribe allows for the seamless integration of both sound effects and music. Sound effects can punctuate key moments, adding emphasis and emotional weight to your narrative. For example, a subtle whoosh sound can accompany a text reveal, while a more dramatic sound effect can highlight a significant plot point. Music sets the mood and tone of your video, creating an immersive experience for the viewer.
Choosing royalty-free music from reputable sources is essential to avoid copyright issues. Remember to carefully balance the volume levels of your sound effects and music to avoid overwhelming the narration or making the audio difficult to understand.
Video Optimization for Different Platforms
Optimizing your videos for different platforms ensures they look and play their best regardless of where they are viewed. This involves considering factors like resolution, aspect ratio, and file size. For instance, a video optimized for YouTube might need different settings than one intended for Instagram or TikTok. Videoscribe allows you to export videos in various resolutions and formats, enabling you to tailor your output to the specific platform’s requirements.
Keeping file sizes manageable is also important, as larger files can lead to longer loading times and poor playback experiences. Experiment with different export settings to find the optimal balance between quality and file size for each platform.
Videoscribe for Different Industries

Videoscribe’s versatility makes it a valuable tool across various sectors, enabling businesses and educators to create engaging and easily digestible content. Its simplicity allows even those without advanced design skills to produce professional-looking videos, boosting efficiency and impact. We’ll explore how Videoscribe shines in marketing, education, and explainer video creation.
Videoscribe in Marketing and Advertising
Videoscribe’s whiteboard animation style is particularly effective in marketing and advertising. Its hand-drawn aesthetic creates a friendly and approachable feel, making it ideal for capturing attention and conveying complex information in a clear and concise manner. Marketing teams use Videoscribe to craft compelling ads, product demos, and social media content. For example, a tech company might use Videoscribe to explain the features of its new software, visually guiding viewers through the process.
A food company could use it to showcase the ingredients and preparation of a recipe, appealing to the audience’s visual senses and creating a memorable experience. The ability to integrate branding elements, such as logos and colors, further enhances the marketing message, ensuring brand consistency across all platforms.
Videoscribe in Education and Training
In education and training, Videoscribe offers a unique approach to knowledge transfer. Its engaging visual style helps learners retain information more effectively compared to traditional methods like lengthy text documents or static presentations. Videoscribe can be used to create instructional videos, tutorials, and engaging lessons for various subjects. For instance, a history teacher might use Videoscribe to create a video explaining a historical event, bringing the past to life through visuals and narration.
A corporate training department could use it to create a tutorial explaining new software or safety procedures, making the training process more accessible and engaging for employees. The ability to break down complex concepts into smaller, easily digestible chunks makes Videoscribe an invaluable tool for effective knowledge dissemination.
Videoscribe for Explainer Videos
Explainer videos are a powerful tool for businesses of all sizes, and Videoscribe is perfectly suited for their creation. Its straightforward interface allows for the creation of videos that clearly and concisely explain complex products, services, or concepts. Consider a SaaS company explaining its subscription model; Videoscribe can break down pricing tiers and features in a visually appealing manner.
Or an environmental organization might use Videoscribe to explain the effects of climate change, making a complex scientific issue more understandable for a wider audience. The versatility of Videoscribe allows for the creation of explainer videos tailored to specific industry needs, effectively communicating key information and driving engagement.
Troubleshooting Common Videoscribe Issues
So, you’re diving into the world of Videoscribe and hitting a few snags? Don’t worry, it happens to the best of us! This section will cover some common problems and their solutions, helping you get back to creating awesome whiteboard animations. We’ll cover technical glitches, rendering issues, and export headaches, so you can get back to the fun part – making videos.
Videoscribe, while generally user-friendly, can sometimes present unexpected challenges. Understanding the root causes of these issues is key to resolving them quickly and efficiently. This troubleshooting guide focuses on practical solutions, enabling you to overcome common obstacles and continue your video creation workflow smoothly.
Video Rendering Problems
Rendering issues are a common frustration for Videoscribe users. These can range from slow rendering speeds to complete failures. Understanding the causes and implementing the solutions below can significantly improve your workflow.
| Problem | Cause | Solution | Additional Notes |
|---|---|---|---|
| Slow Rendering Speed | Low system resources (RAM, CPU), complex project with many images/animations, outdated software | Close unnecessary applications, upgrade system RAM if needed, optimize your project (reduce image size, simplify animations), update Videoscribe to the latest version. | Consider rendering smaller sections of your video separately if the entire project is too demanding. |
| Rendering Failure | Corrupted project file, insufficient disk space, incompatible codecs, software bugs | Try creating a new project and importing your assets, ensure sufficient disk space is available, check your system’s codec compatibility, reinstall Videoscribe. | Save your project frequently to avoid losing progress. Contact Videoscribe support if the problem persists. |
| Export Issues (Incorrect Format/Resolution) | Incorrect export settings selected, incompatible export format with your target platform. | Double-check your export settings (resolution, frame rate, format) before exporting. Ensure the chosen format is compatible with the platform you’re uploading to (YouTube, Vimeo, etc.). | Test your export settings on a small section of your video before exporting the entire project. |
Exporting Issues
Getting your finished video out of Videoscribe and ready to share can sometimes be tricky. This section will cover common export problems and how to solve them.
| Problem | Cause | Solution | Additional Notes |
|---|---|---|---|
| Video File Too Large | High resolution, long video duration, high bitrate | Reduce video resolution, shorten video length, lower bitrate. Experiment to find the best balance between quality and file size. | Consider using compression software after exporting if necessary. |
| Audio Issues in Exported Video | Incorrect audio settings, incompatible audio codec | Check audio levels within Videoscribe before exporting. Ensure your audio codec is compatible with the video format. | Test your audio in a separate player before exporting the final video. |
| Missing Elements in Exported Video | Issues with project file, problems with export process | Try re-rendering your project. If the problem persists, try creating a new project and importing your assets. | Save your project frequently and always keep a backup copy. |
The Future of Videoscribe and Similar Technologies
Videoscribe, and whiteboard animation software in general, is poised for significant growth and evolution. The increasing demand for engaging and easily digestible visual content across various platforms, from marketing to education, fuels this trajectory. We’ll explore potential developments, compare current capabilities to emerging trends, and suggest features that could take Videoscribe to the next level.
Currently, Videoscribe excels at creating simple, yet effective, whiteboard animations. Its user-friendly interface and extensive library of assets make it accessible to a broad audience. However, the animation landscape is constantly shifting, with advancements in AI and real-time rendering pushing the boundaries of what’s possible. Comparing Videoscribe’s current functionality to these advancements reveals both strengths and areas ripe for innovation.
Potential Videoscribe Developments and Updates
Several potential updates could significantly enhance Videoscribe’s capabilities. Imagine a more robust AI-powered asset creation tool, allowing users to generate custom characters and backgrounds from simple text prompts. This would dramatically reduce production time and expand creative possibilities. Furthermore, improved integration with other software, such as collaborative editing tools or direct export to social media platforms, would streamline the workflow and broaden reach.
Enhanced animation features, such as more sophisticated character rigging and realistic physics simulations, would allow for more dynamic and engaging animations, pushing beyond the current limitations of relatively simple movements.
Comparison of Videoscribe to Emerging Trends
Emerging trends in animation technology, like real-time rendering and AI-driven animation, offer exciting possibilities. Real-time rendering, already used in high-end game engines, could potentially allow for interactive whiteboard animations, creating a more dynamic viewing experience. AI-driven animation tools are becoming increasingly sophisticated, capable of generating realistic character movements and expressions. While Videoscribe currently focuses on a simpler, more hand-drawn aesthetic, incorporating some aspects of these technologies could significantly enhance its capabilities without compromising its core identity.
For instance, AI could assist in generating variations of existing assets, creating a wider range of options for users.
Potential New Features to Enhance Functionality
Several new features could significantly boost Videoscribe’s functionality. A built-in library of pre-animated scenes and transitions would accelerate the creation process, particularly for users with limited animation experience. Advanced audio editing capabilities, including noise reduction and automatic lip-syncing, would elevate the overall production quality. Improved collaboration tools, allowing multiple users to work on the same project simultaneously, would be highly beneficial for team projects.
Finally, the ability to import and utilize 3D models and animations would dramatically expand the creative potential of the software, enabling the creation of more complex and visually rich videos.
Creating Engaging Videoscribe Content
Crafting compelling Videoscribe animations requires a strategic approach that blends visual appeal with informative storytelling. Think of it like this: you’re not just making a video; you’re weaving a narrative, one hand-drawn image at a time. The key is to capture attention and keep viewers hooked until the very end.Effective Videoscribe content isn’t just about pretty pictures; it’s about conveying information clearly and concisely.
A well-designed Videoscribe animation should be both visually stimulating and easy to understand, leaving the viewer with a clear takeaway message. This means careful consideration of pacing, visuals, and the overall narrative arc.
Visual Appeal and Information Conveyance
To create visually appealing and informative Videoscribe animations, start with a strong script. Artikel your key points and determine how best to represent them visually. Think about using a variety of drawing styles, colors, and animation techniques to maintain viewer interest. For example, a simple change in font or background color can significantly impact the mood and pacing of your video.
Consider using contrasting colors to highlight important information and maintaining a consistent color palette to create a cohesive look. Also, remember the power of whitespace; don’t overcrowd the screen with too many elements. A clean, uncluttered design is often more effective.
Effective Storytelling Techniques
Videoscribe, despite its simplicity, allows for a range of storytelling techniques. One powerful approach is the use of metaphors and analogies. For instance, if explaining a complex financial concept, you might use an animated visual of a growing tree to represent investment growth. Another effective technique is to employ a problem/solution structure. Present a challenge, then visually demonstrate how the solution addresses the issue.
Think of a before-and-after scenario, clearly illustrating the positive impact. Furthermore, using characters can personalize your message and make it more relatable. Even simple, hand-drawn characters can add a lot of personality and engagement.
Optimizing Videoscribe Videos for Maximum Engagement
Optimizing your Videoscribe videos for engagement requires attention to several key areas. First, keep your videos concise. Attention spans are short, so aim for a length that suits your message and target audience. Second, use clear and concise language. Avoid jargon and complex terminology unless your audience is familiar with it.
Third, incorporate calls to action. Encourage viewers to like, comment, share, or visit your website. This fosters interaction and helps build a community around your content. Finally, consider A/B testing different versions of your video to see which performs best. This allows you to refine your approach and improve your results over time.
For example, you might test different thumbnails or calls to action to see which generates the most clicks and views.
Last Word
Whether you’re a seasoned video pro or just starting out, Videoscribe offers a powerful and accessible way to bring your ideas to life. From its simple interface to its advanced features, Videoscribe empowers you to create engaging content that resonates with your audience. By understanding its core functionalities, leveraging available resources, and mastering a few key techniques, you can unlock the full potential of this dynamic animation software and create videos that truly stand out.
So, what are you waiting for? Start animating!
Questions Often Asked
Is Videoscribe only for whiteboard animations?
Nope! While it’s known for its whiteboard style, Videoscribe can also create animations using various other styles and assets.
How much does Videoscribe cost?
Videoscribe offers different subscription plans, so check their website for the latest pricing. They usually have a free trial, too!
What file formats does Videoscribe support for importing assets?
It supports a range of image formats (like PNG, JPG) and vector formats (like SVG). Check the official documentation for the most up-to-date list.
Can I use my own music and sound effects?
Absolutely! Videoscribe lets you import your own audio files to enhance your animations.
What’s the best way to learn Videoscribe quickly?
Combine their official tutorials with YouTube channels dedicated to Videoscribe. Hands-on practice is key!